0%

This project has been a long tiume inclubating as a draft as I kept making adjustments and changes. Eventually I thoughjt I neeed to publish this thing as its been under draft for 5 months now. So the APC was finished in December but the box and blog was finished today.

# What I Ended Up With

A Rakit Atari Punk Console kit with Depth & Pitch control packaged into an old JVC earphones box with a PP3 battery holder superglued to the back. With an all important sticker!
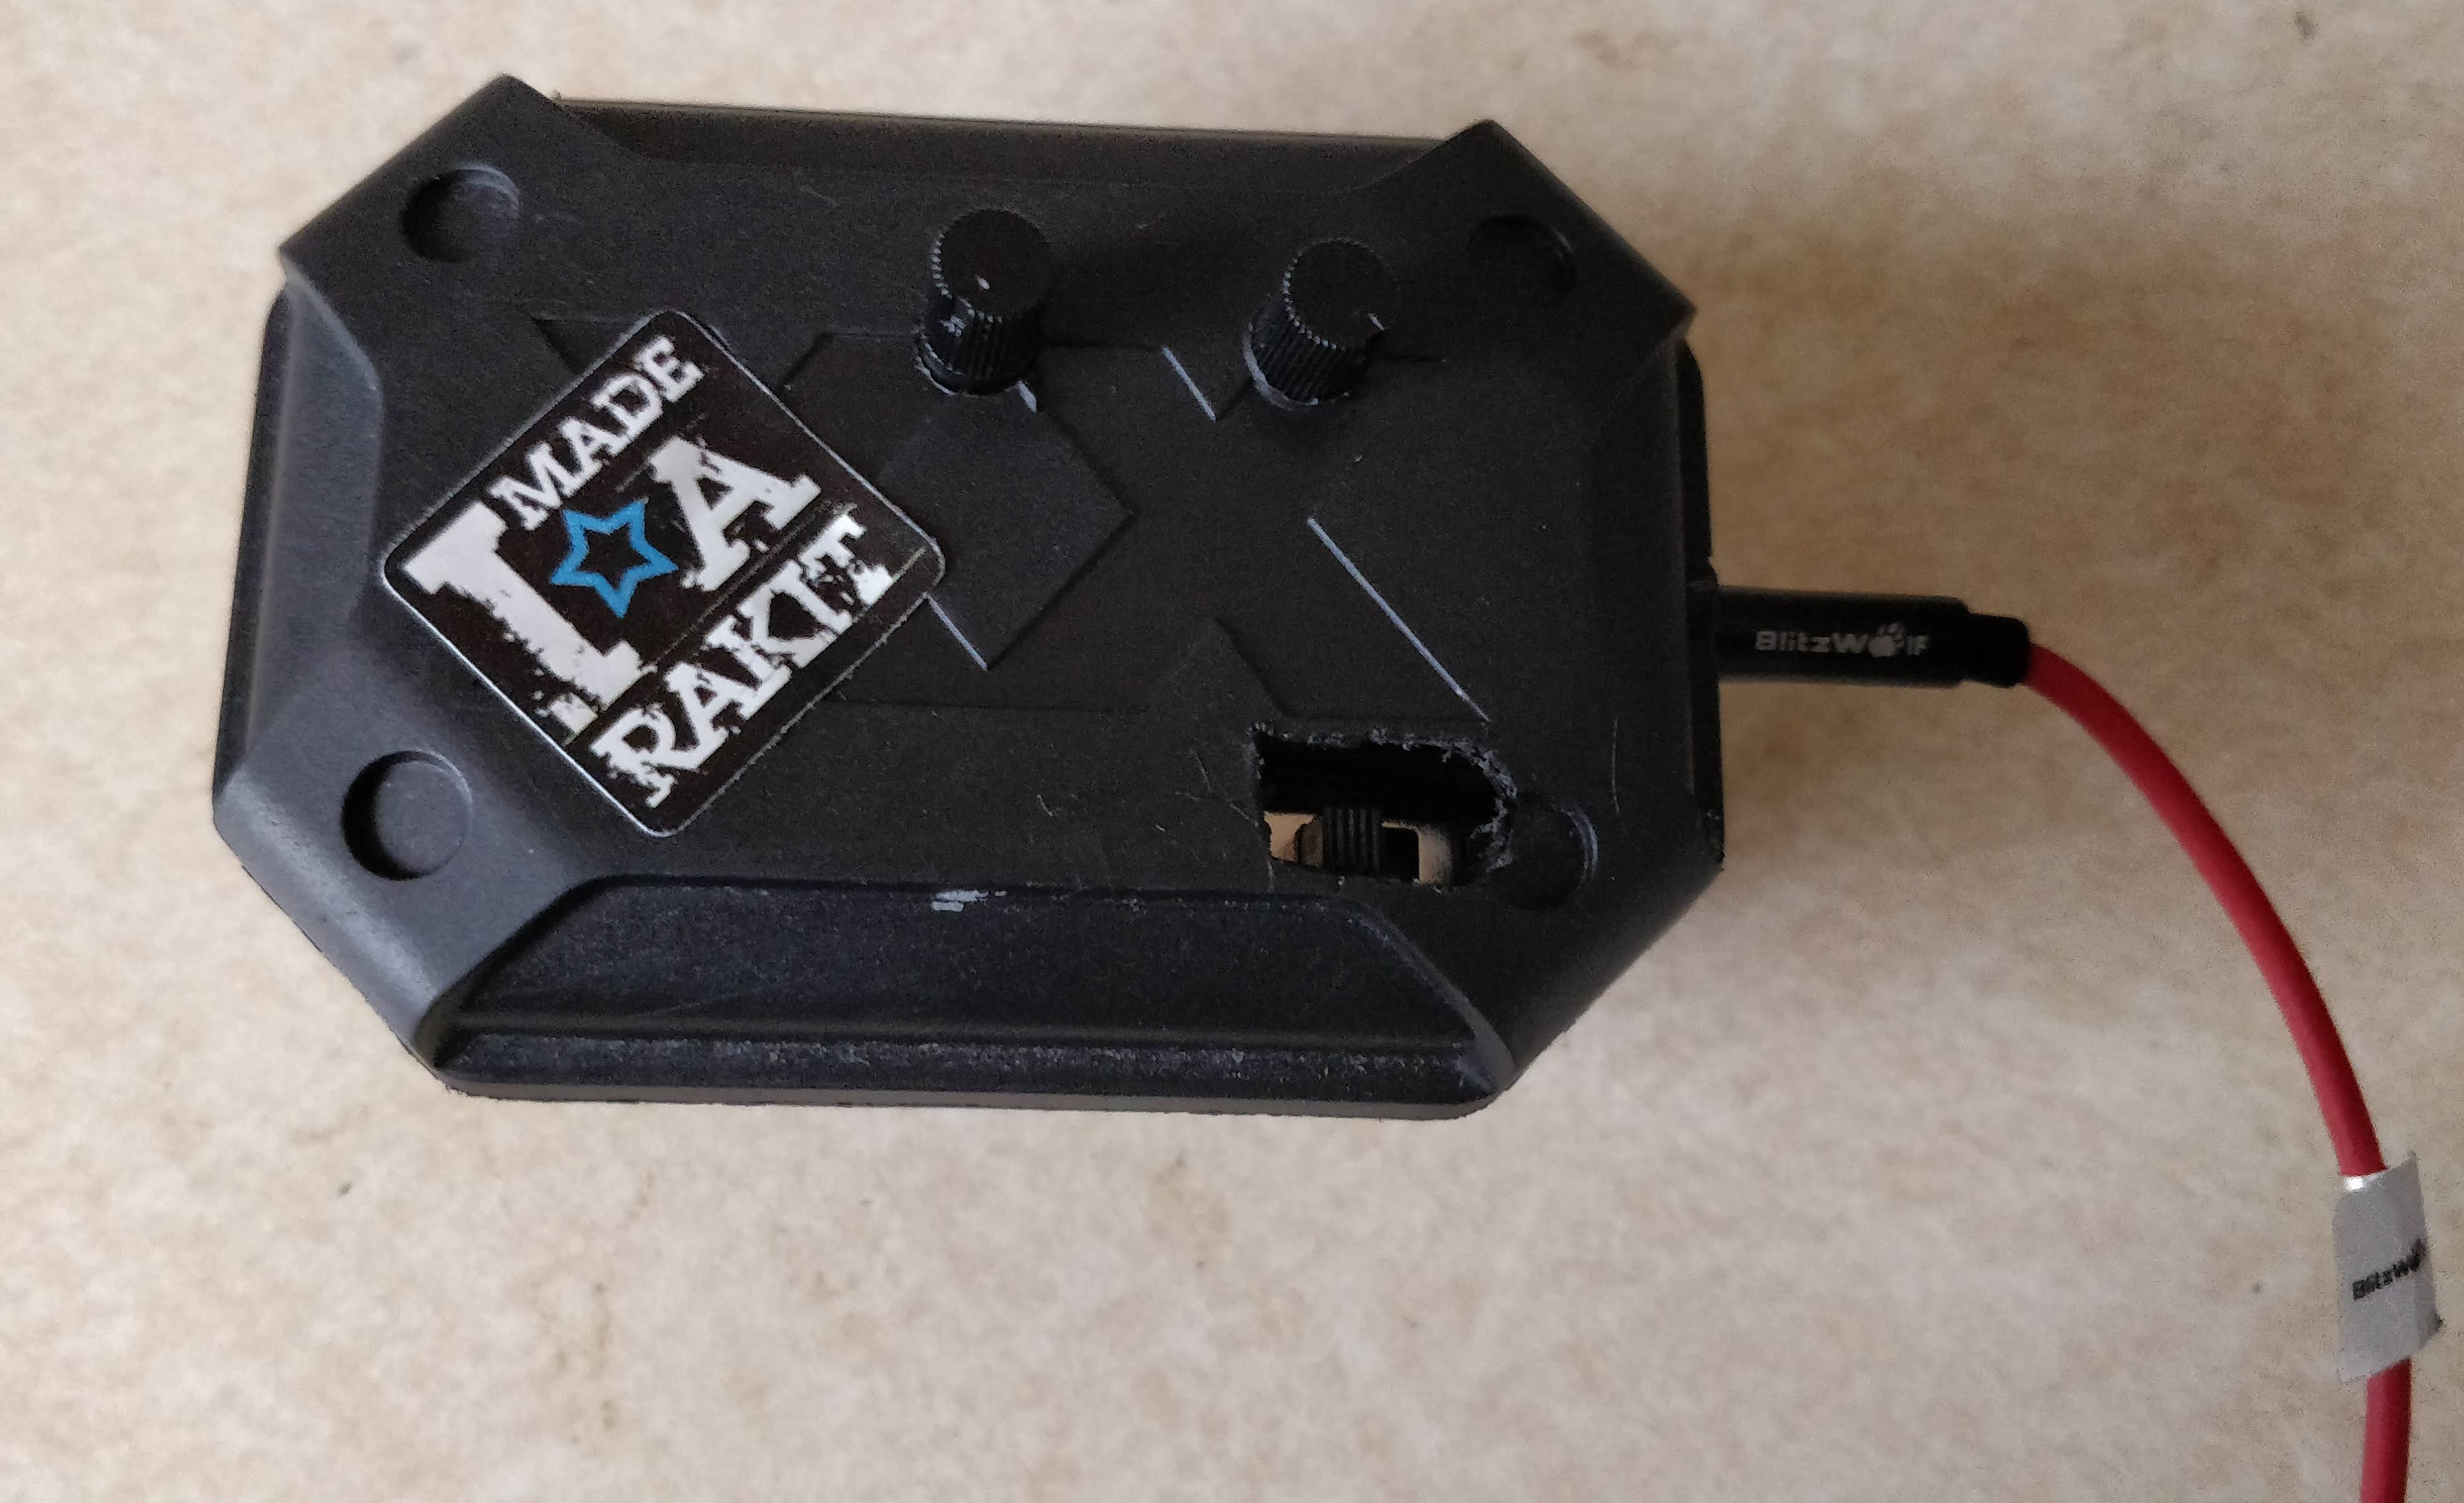
Rakit Atari Punk Console in Project Box

# How I Found What I Wanted (DIY Noise Makers)

I decided to get into DIY electronic kits after seeing the huge number available on BangGood.com. Before I came to Rakits I'd made DIY clocks with temperature and light sensors, multiple failed radios (they're my weakness), power supplies, speaker kits, etc.

But it didn't take long for my industrial music loving brain to come up with the following important formula:

DIY Electronics + Like Noise = DIY Noise Making

So then I went hunting for noise making devices I could hook up to my speakers or just make noise with. I remember an interview with someone from Throbbing Gristle where they openly admitted knowing not a single thing about making music but they enjoyed making noise. Having owned an electric guitar for about 6years and still not being able to get past 3 chords I sympathised and wanted to make noise too but with someth9ing I'd built myself.

# Coming Across Rakit

I came across my first Rakit first via eBay. Their eBay store has the full collection but they have their own site with tons of options and a great informative blog that's well worth checking out.

My first Rakit was the Atari Punk Console which did exactly what I wanted - make noise! I also got a sequencer - that was a mistake! Too soon! It ended up with the LED's on the wrong side, all messed up and I gave up part way and resigned myself to a new one form their site!

Don't be overconfident and take the advice on their sites shop for each item as to how difficult they are - also be worth checking out the Assembly Guides which are there too.

# Building a Box for my First Rakit

Having done a lot of kits that came with their own box I felt my first rakit needed one but only something simple and preferably recycled form the multitude of bits and pieces of cruft I have lying around.

# An Old JVC earphones box

At first I thought I could fit the battery and circuit into the box and be donbe with it but I lacked a few things such as....
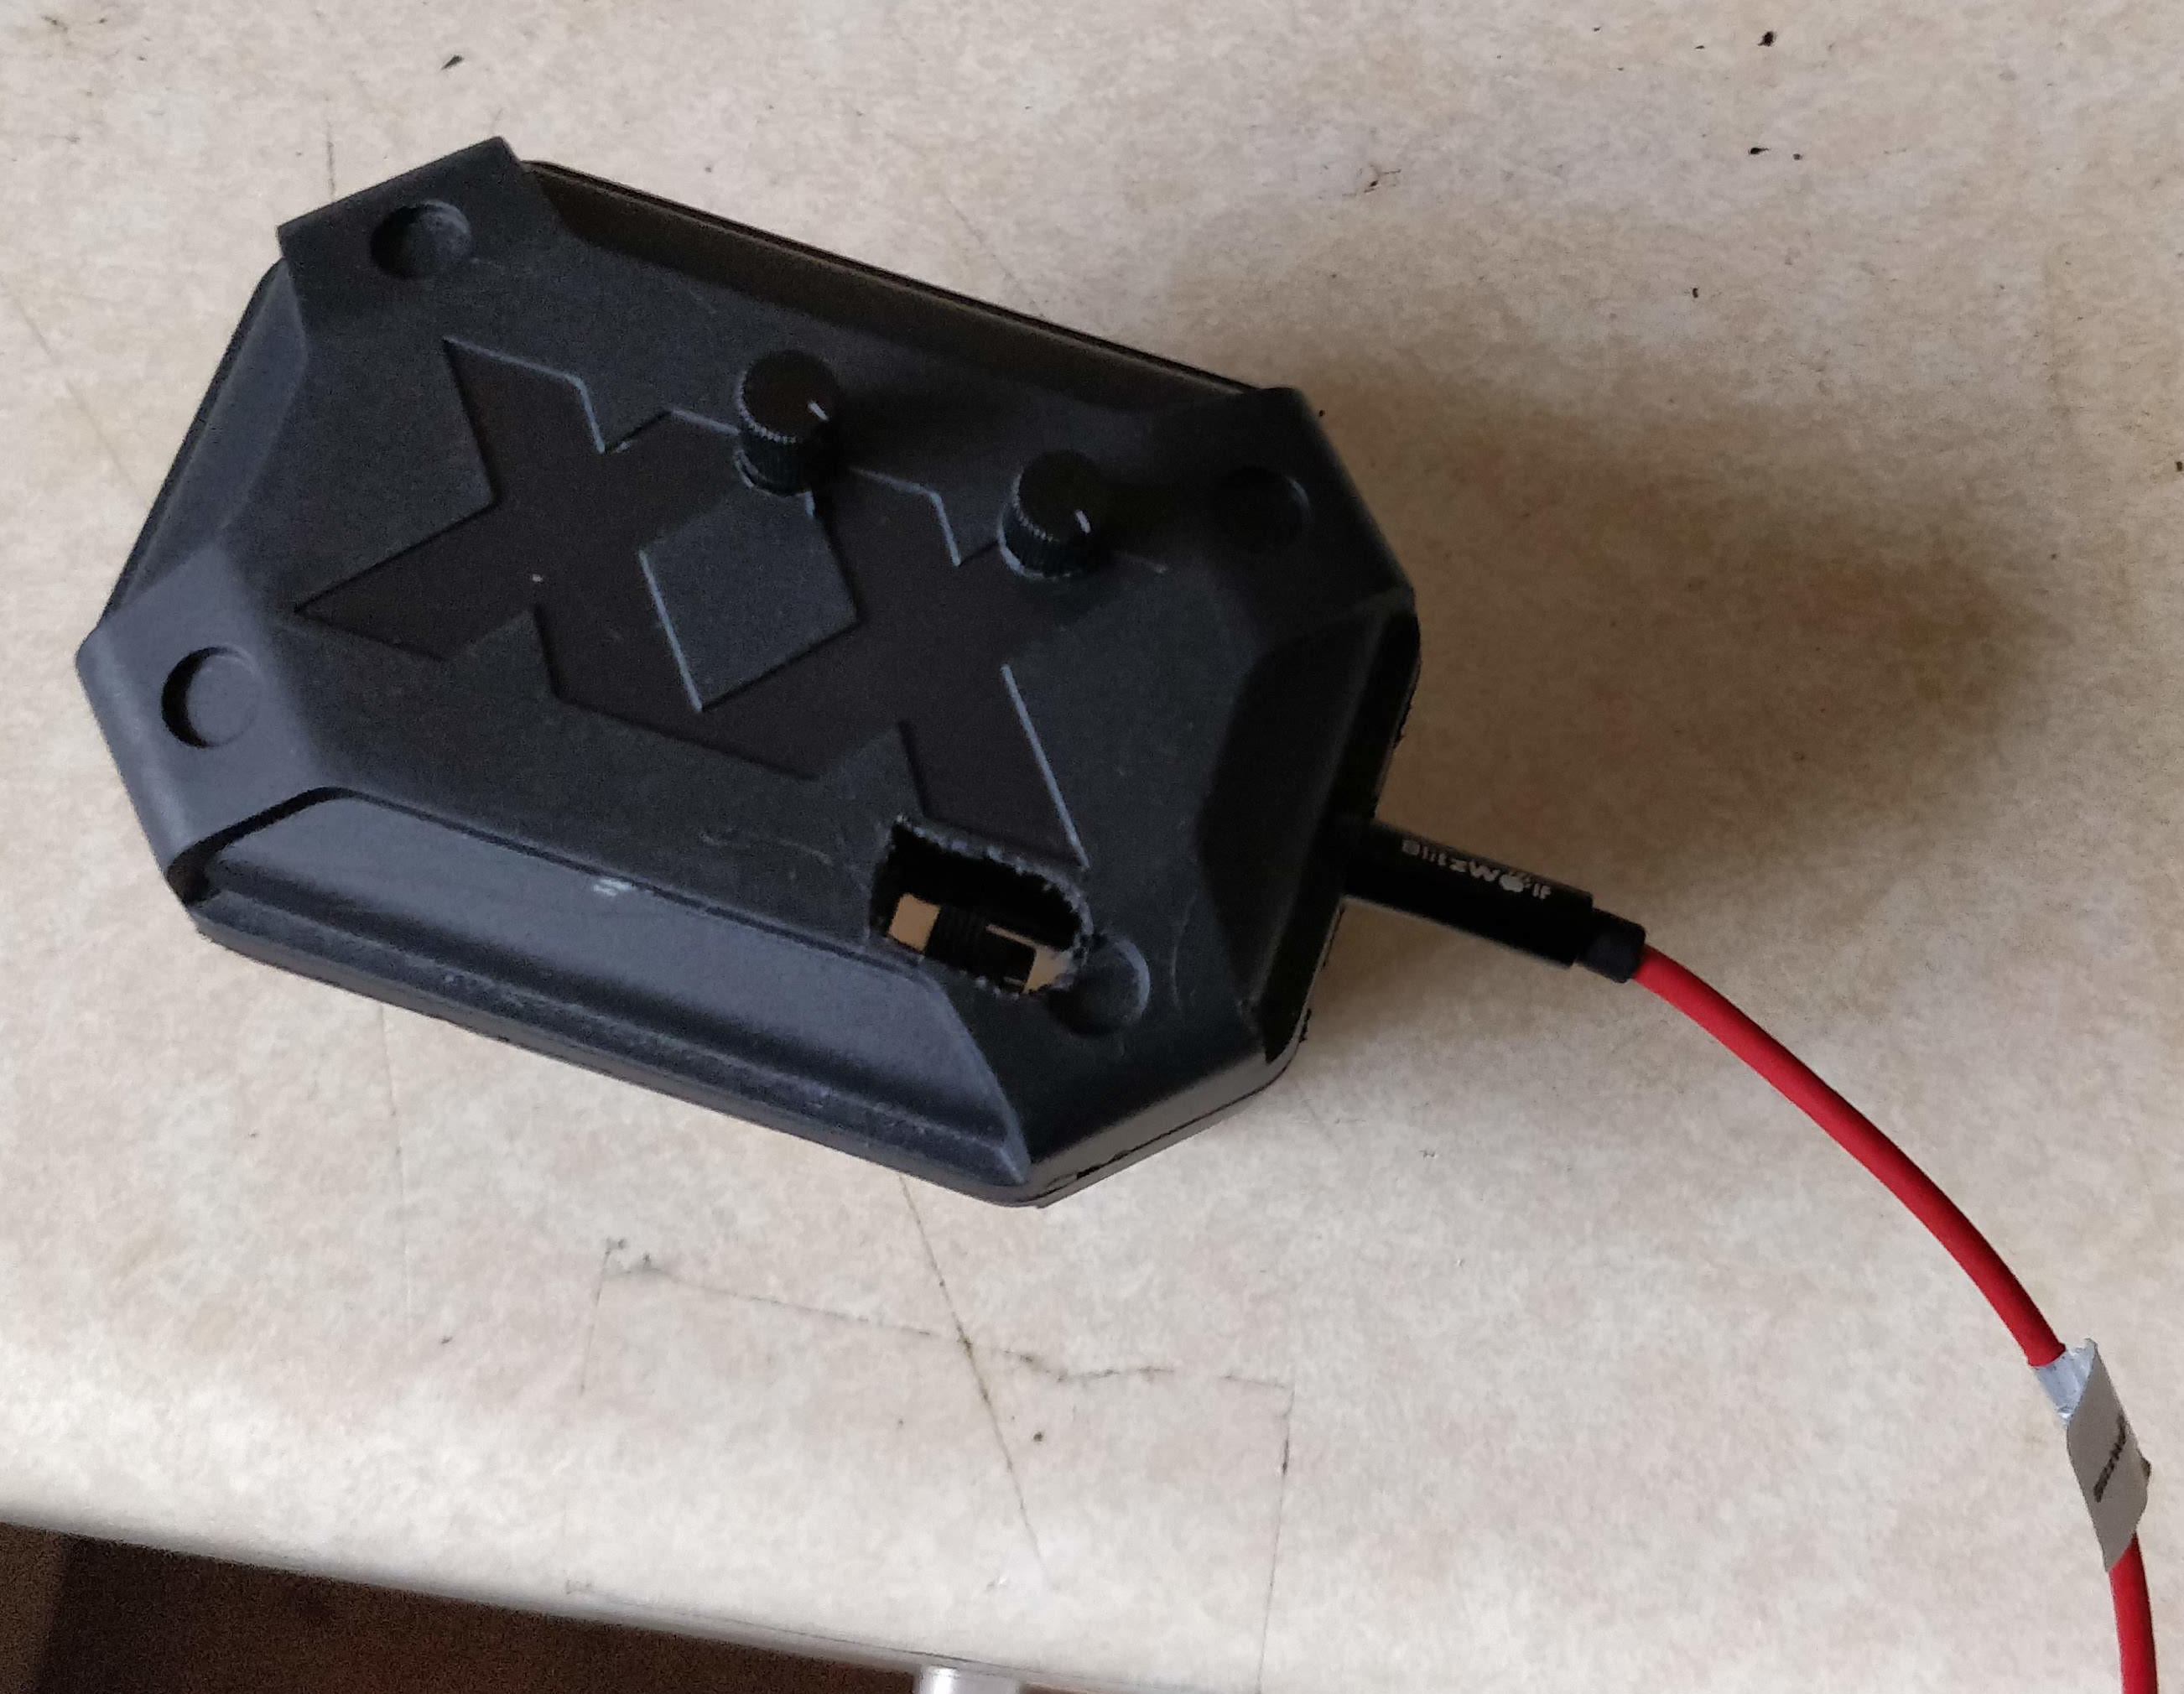
JVC Earphone Boxas a Project Box
  • a drill.
  • drill bits for small holes and big holes.
  • a ruler
  • everything to make a proper project box work!!

So I bought my above list of atefacts online while constructing my APC. I set about creating padding for the base where the Rakit would sit
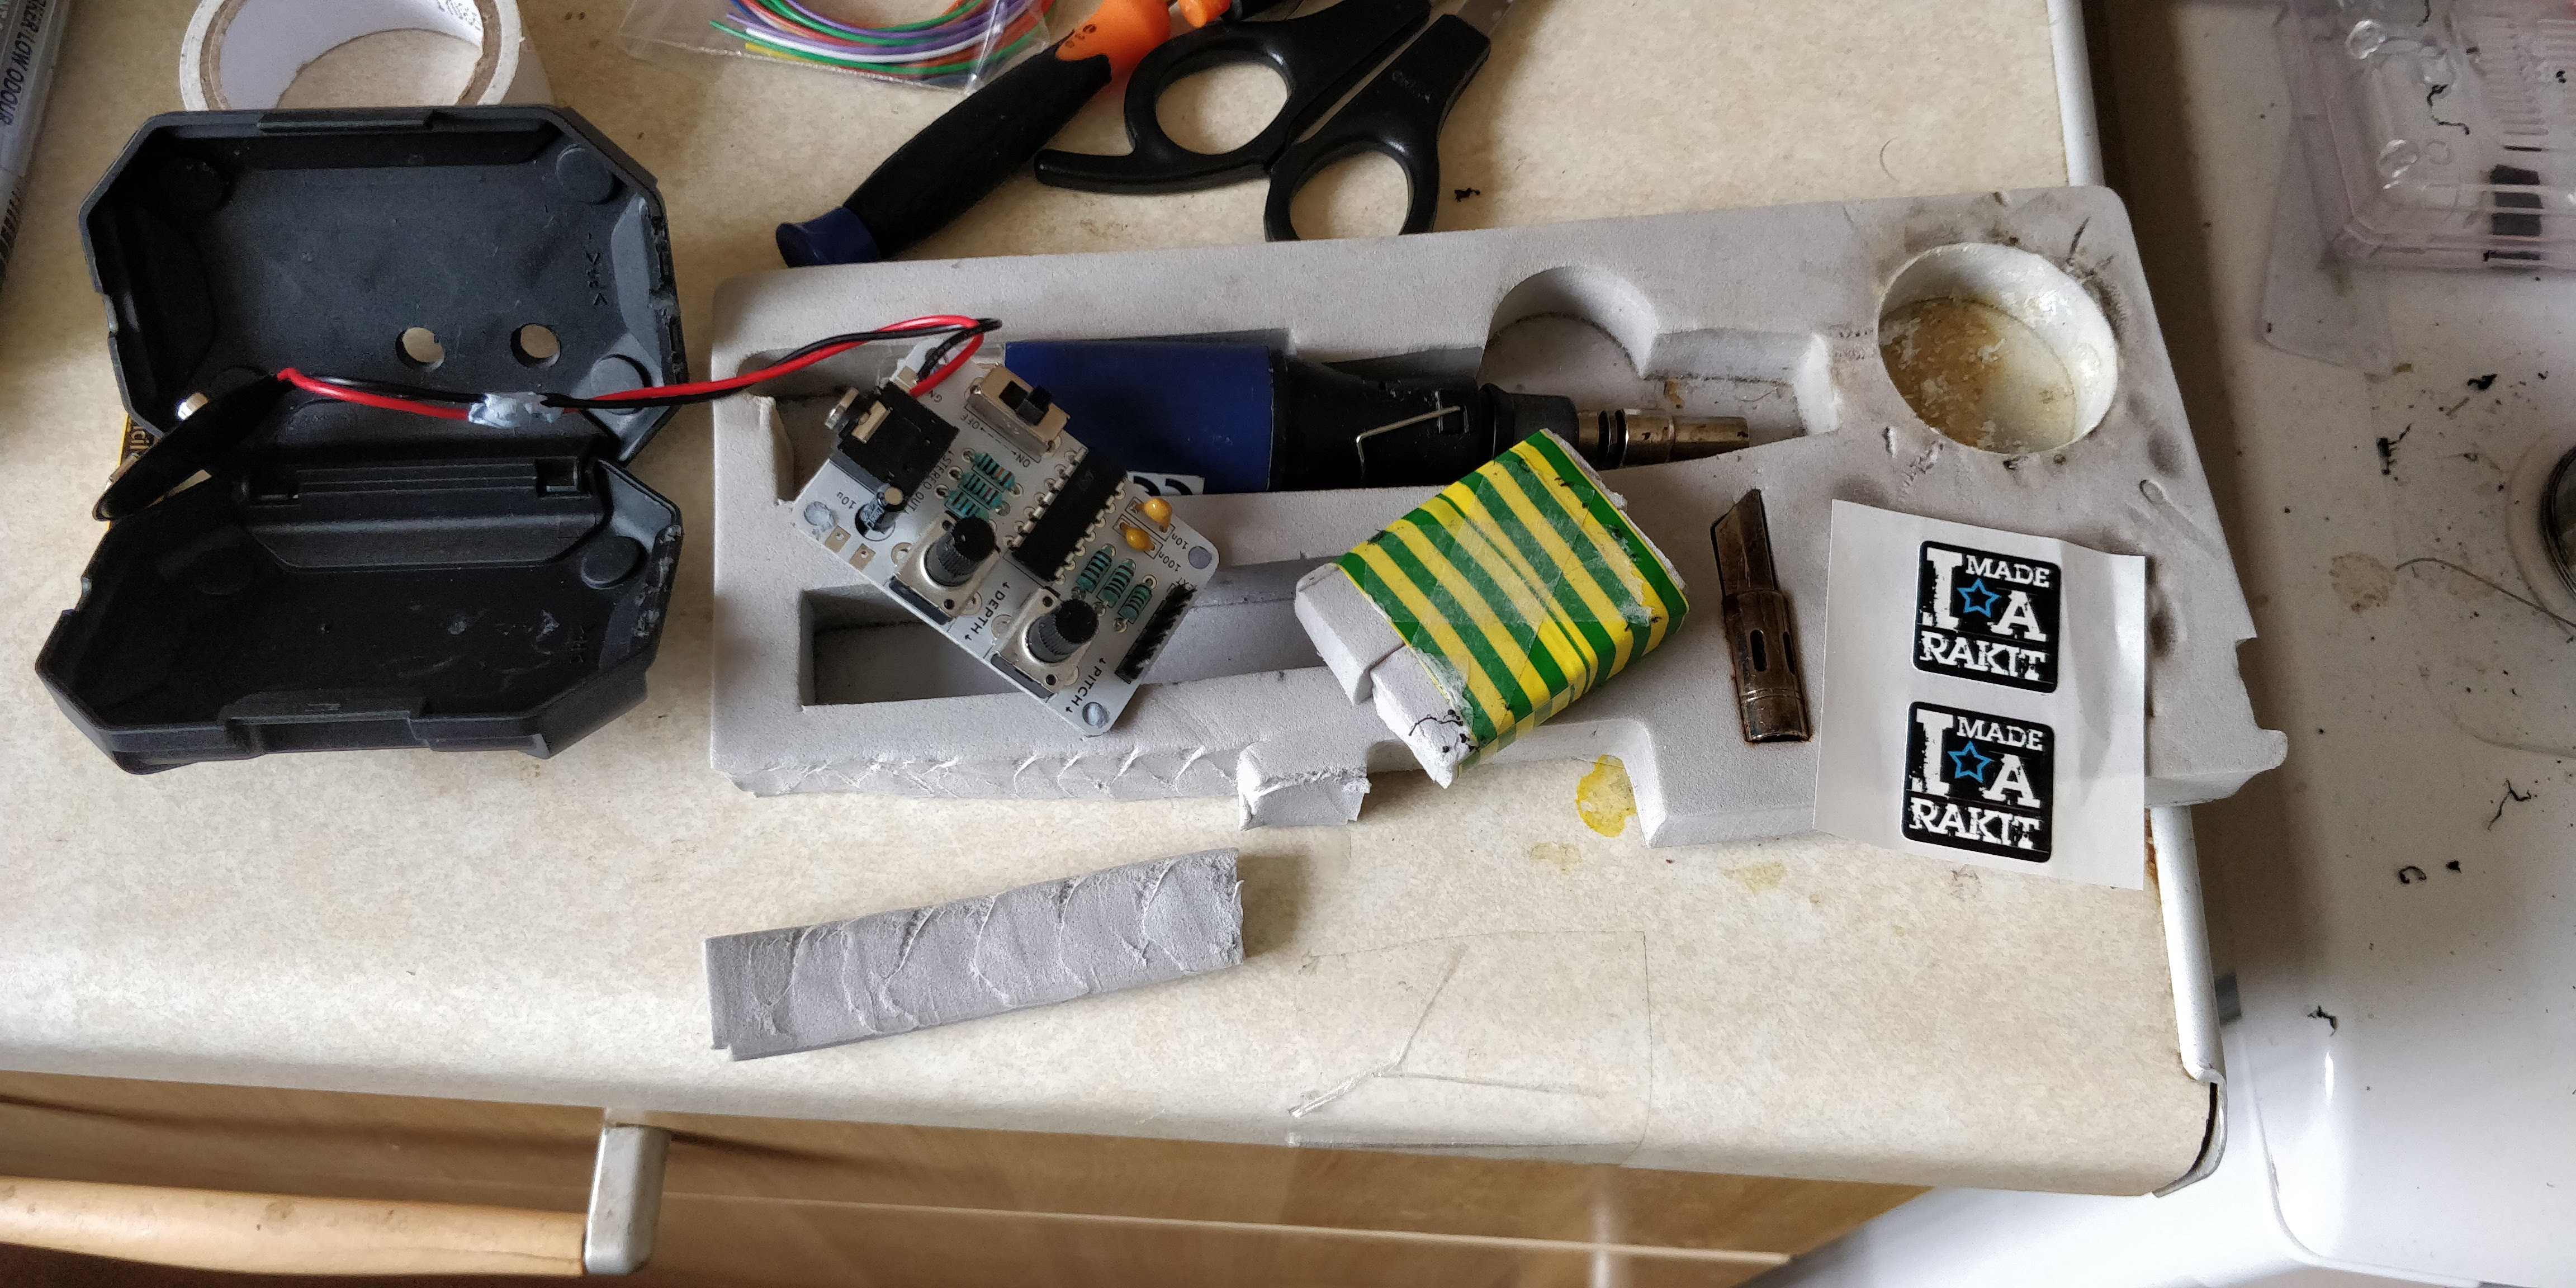
Insulated Padding Bottom Stuck With Double-Sided Tape

At first I was planning on using the battery clip cable that came with the kit but after finding out that my supergluing it to the PCB and melting the insulation (see pic) to it that I needed to find a replacement and reover the situation. I'd recently bought a job lot of about 25 PP3 battery holders so I superglued one to the back after drilling holes for the terminals to slide into that would come up behind the PCB inside the case. See pictures below...
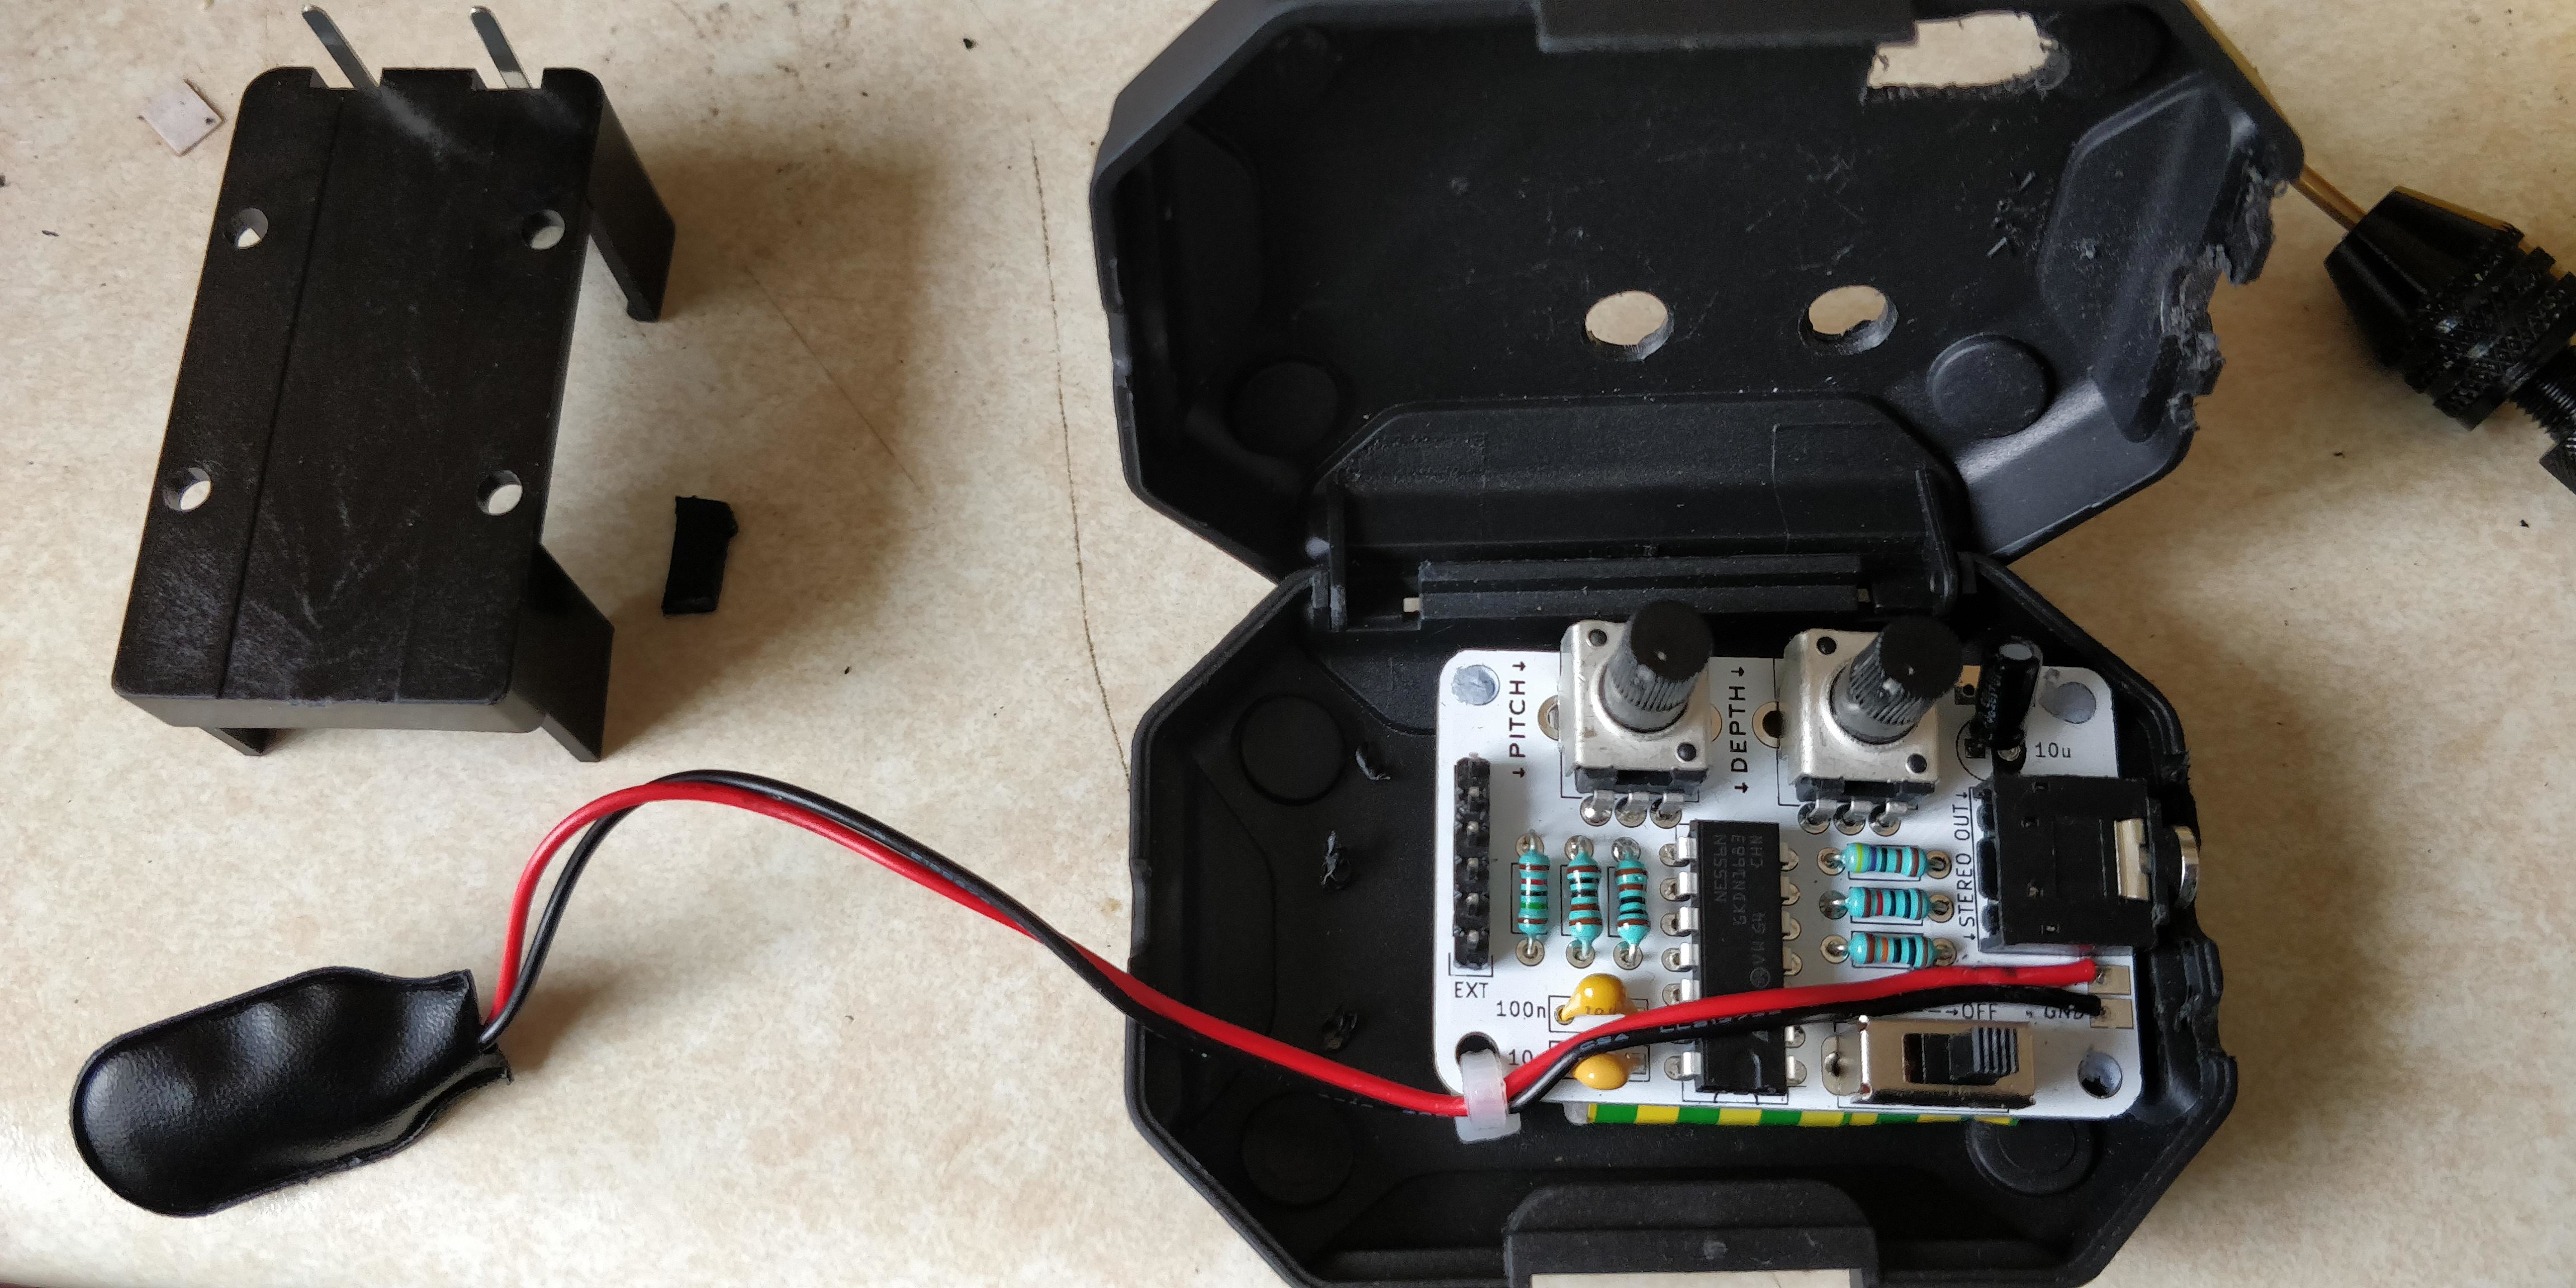
Notice how the battery wire near the PCB looks melted and merged? Choosing holder over clip

You don't have to have an electric drill for any of this work to be honest. I did end up using an electric hand drill for the POT holes but I could have used the hand drill you see in the picture which costs tuppence ha'penny from Amazon or your local hardware shop for about £600 + VAT (and they wonder why local shops go out of business 😕 ).
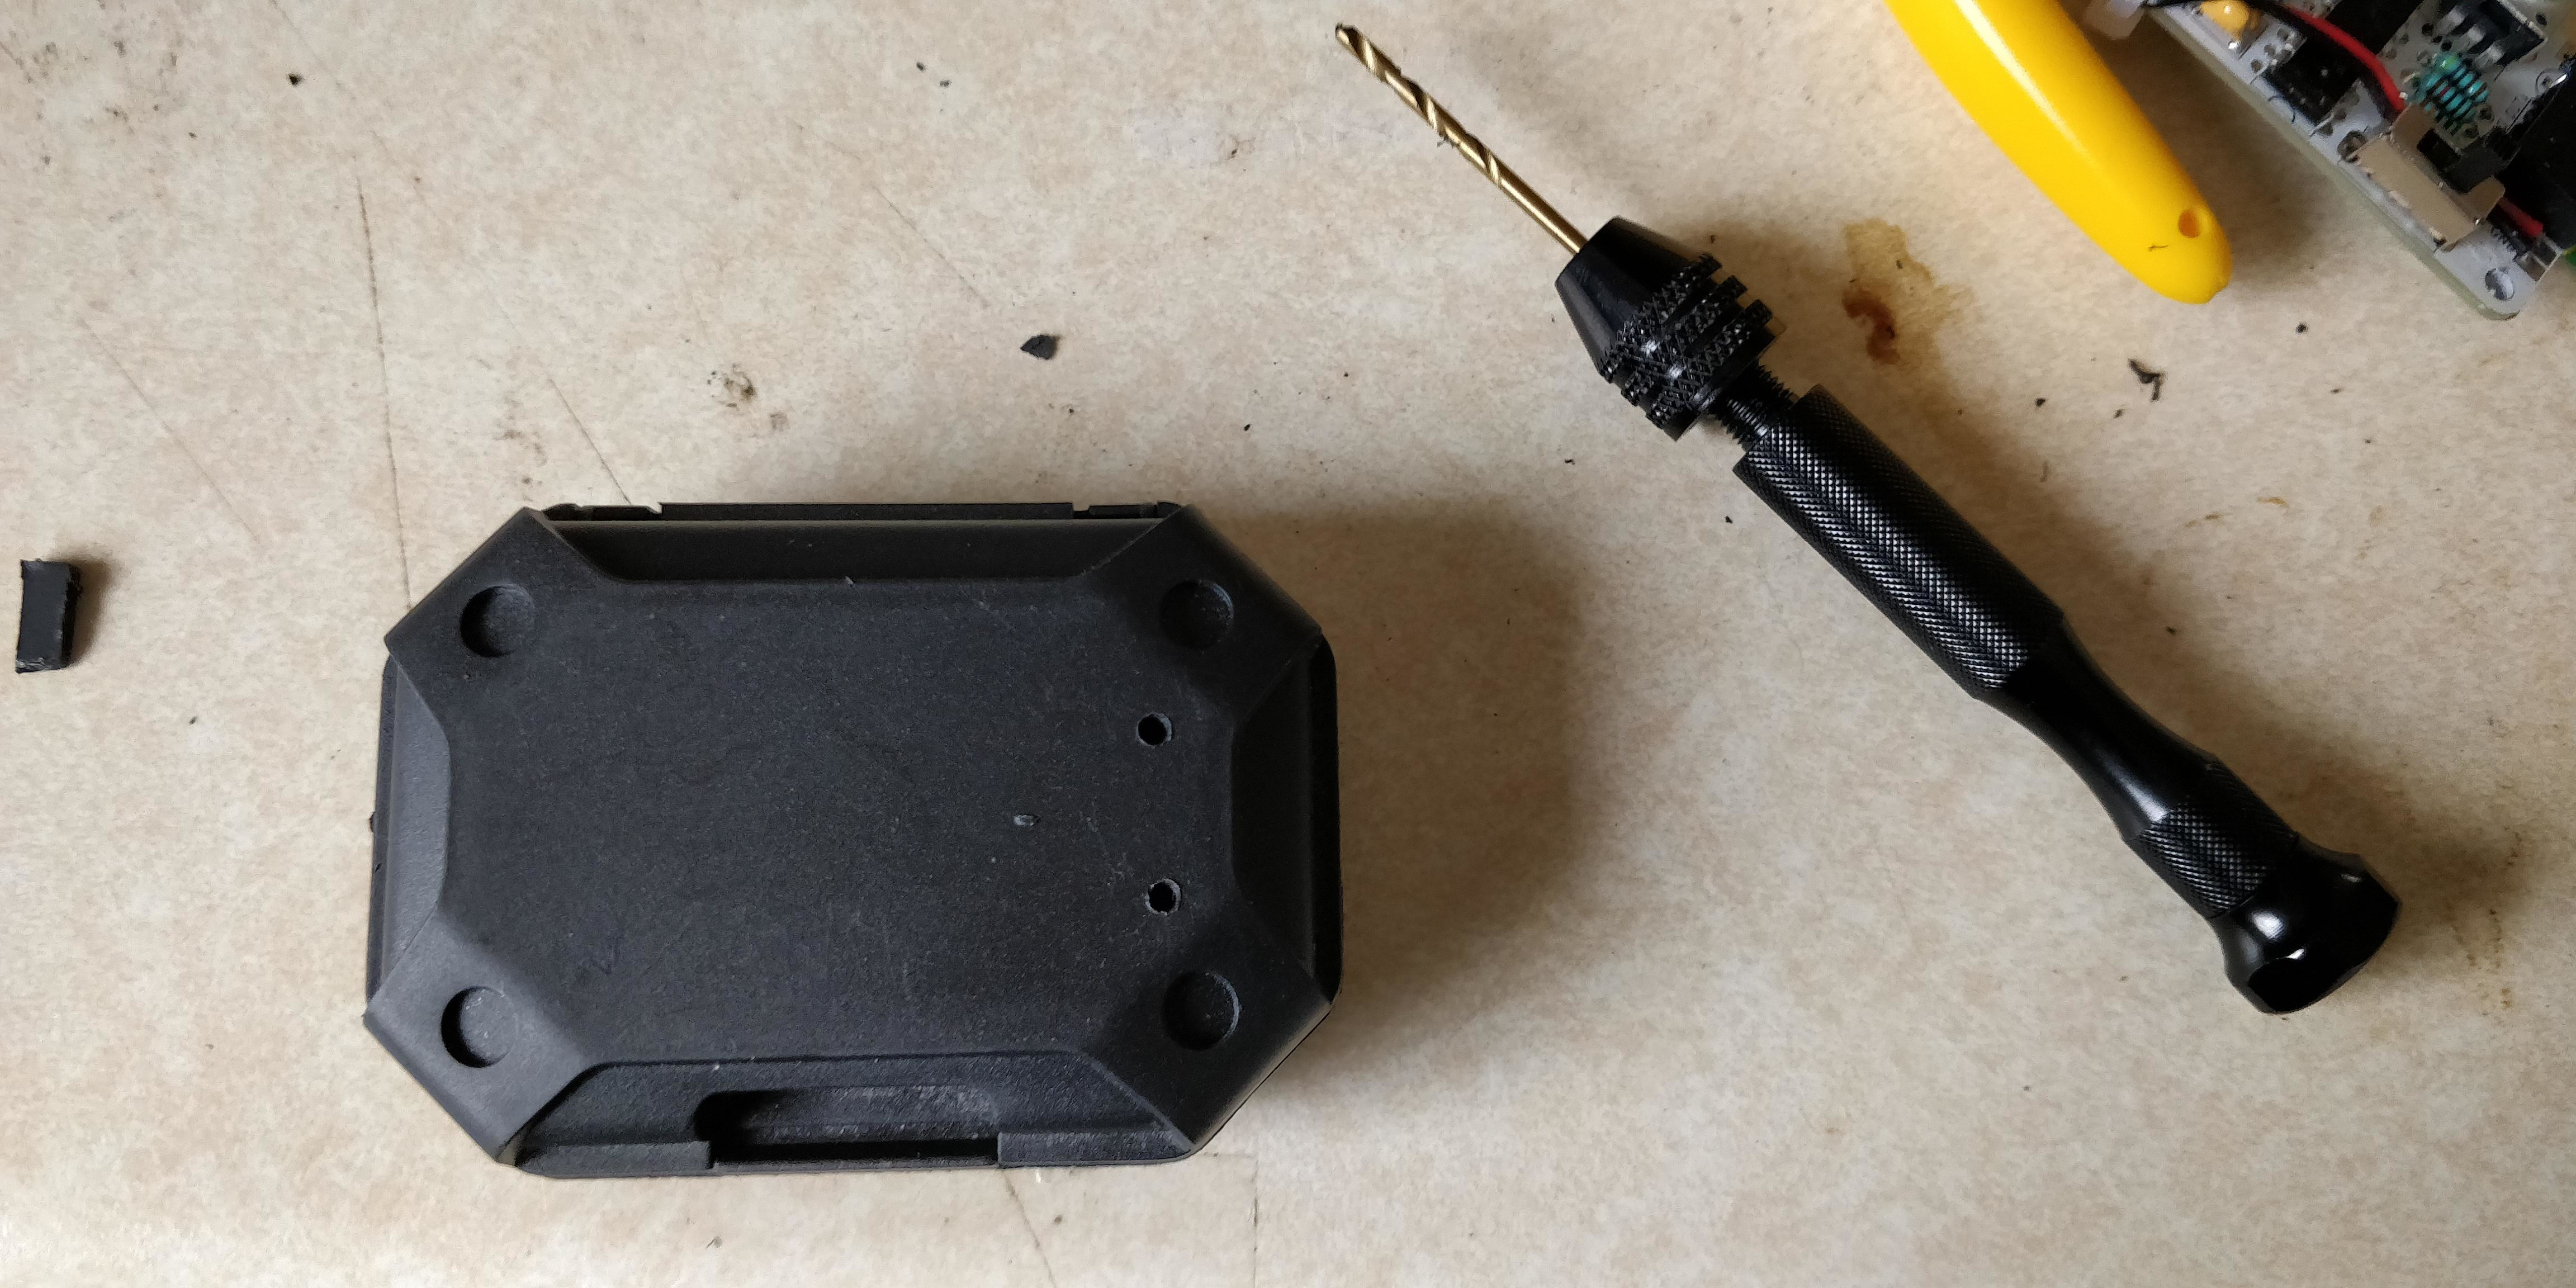
Drilling holes for battery holder terminals

Although there were screw holes for the battery holder (4 in total as you can see) why waste the time and screws when a simple bit of superglue would work just as well.
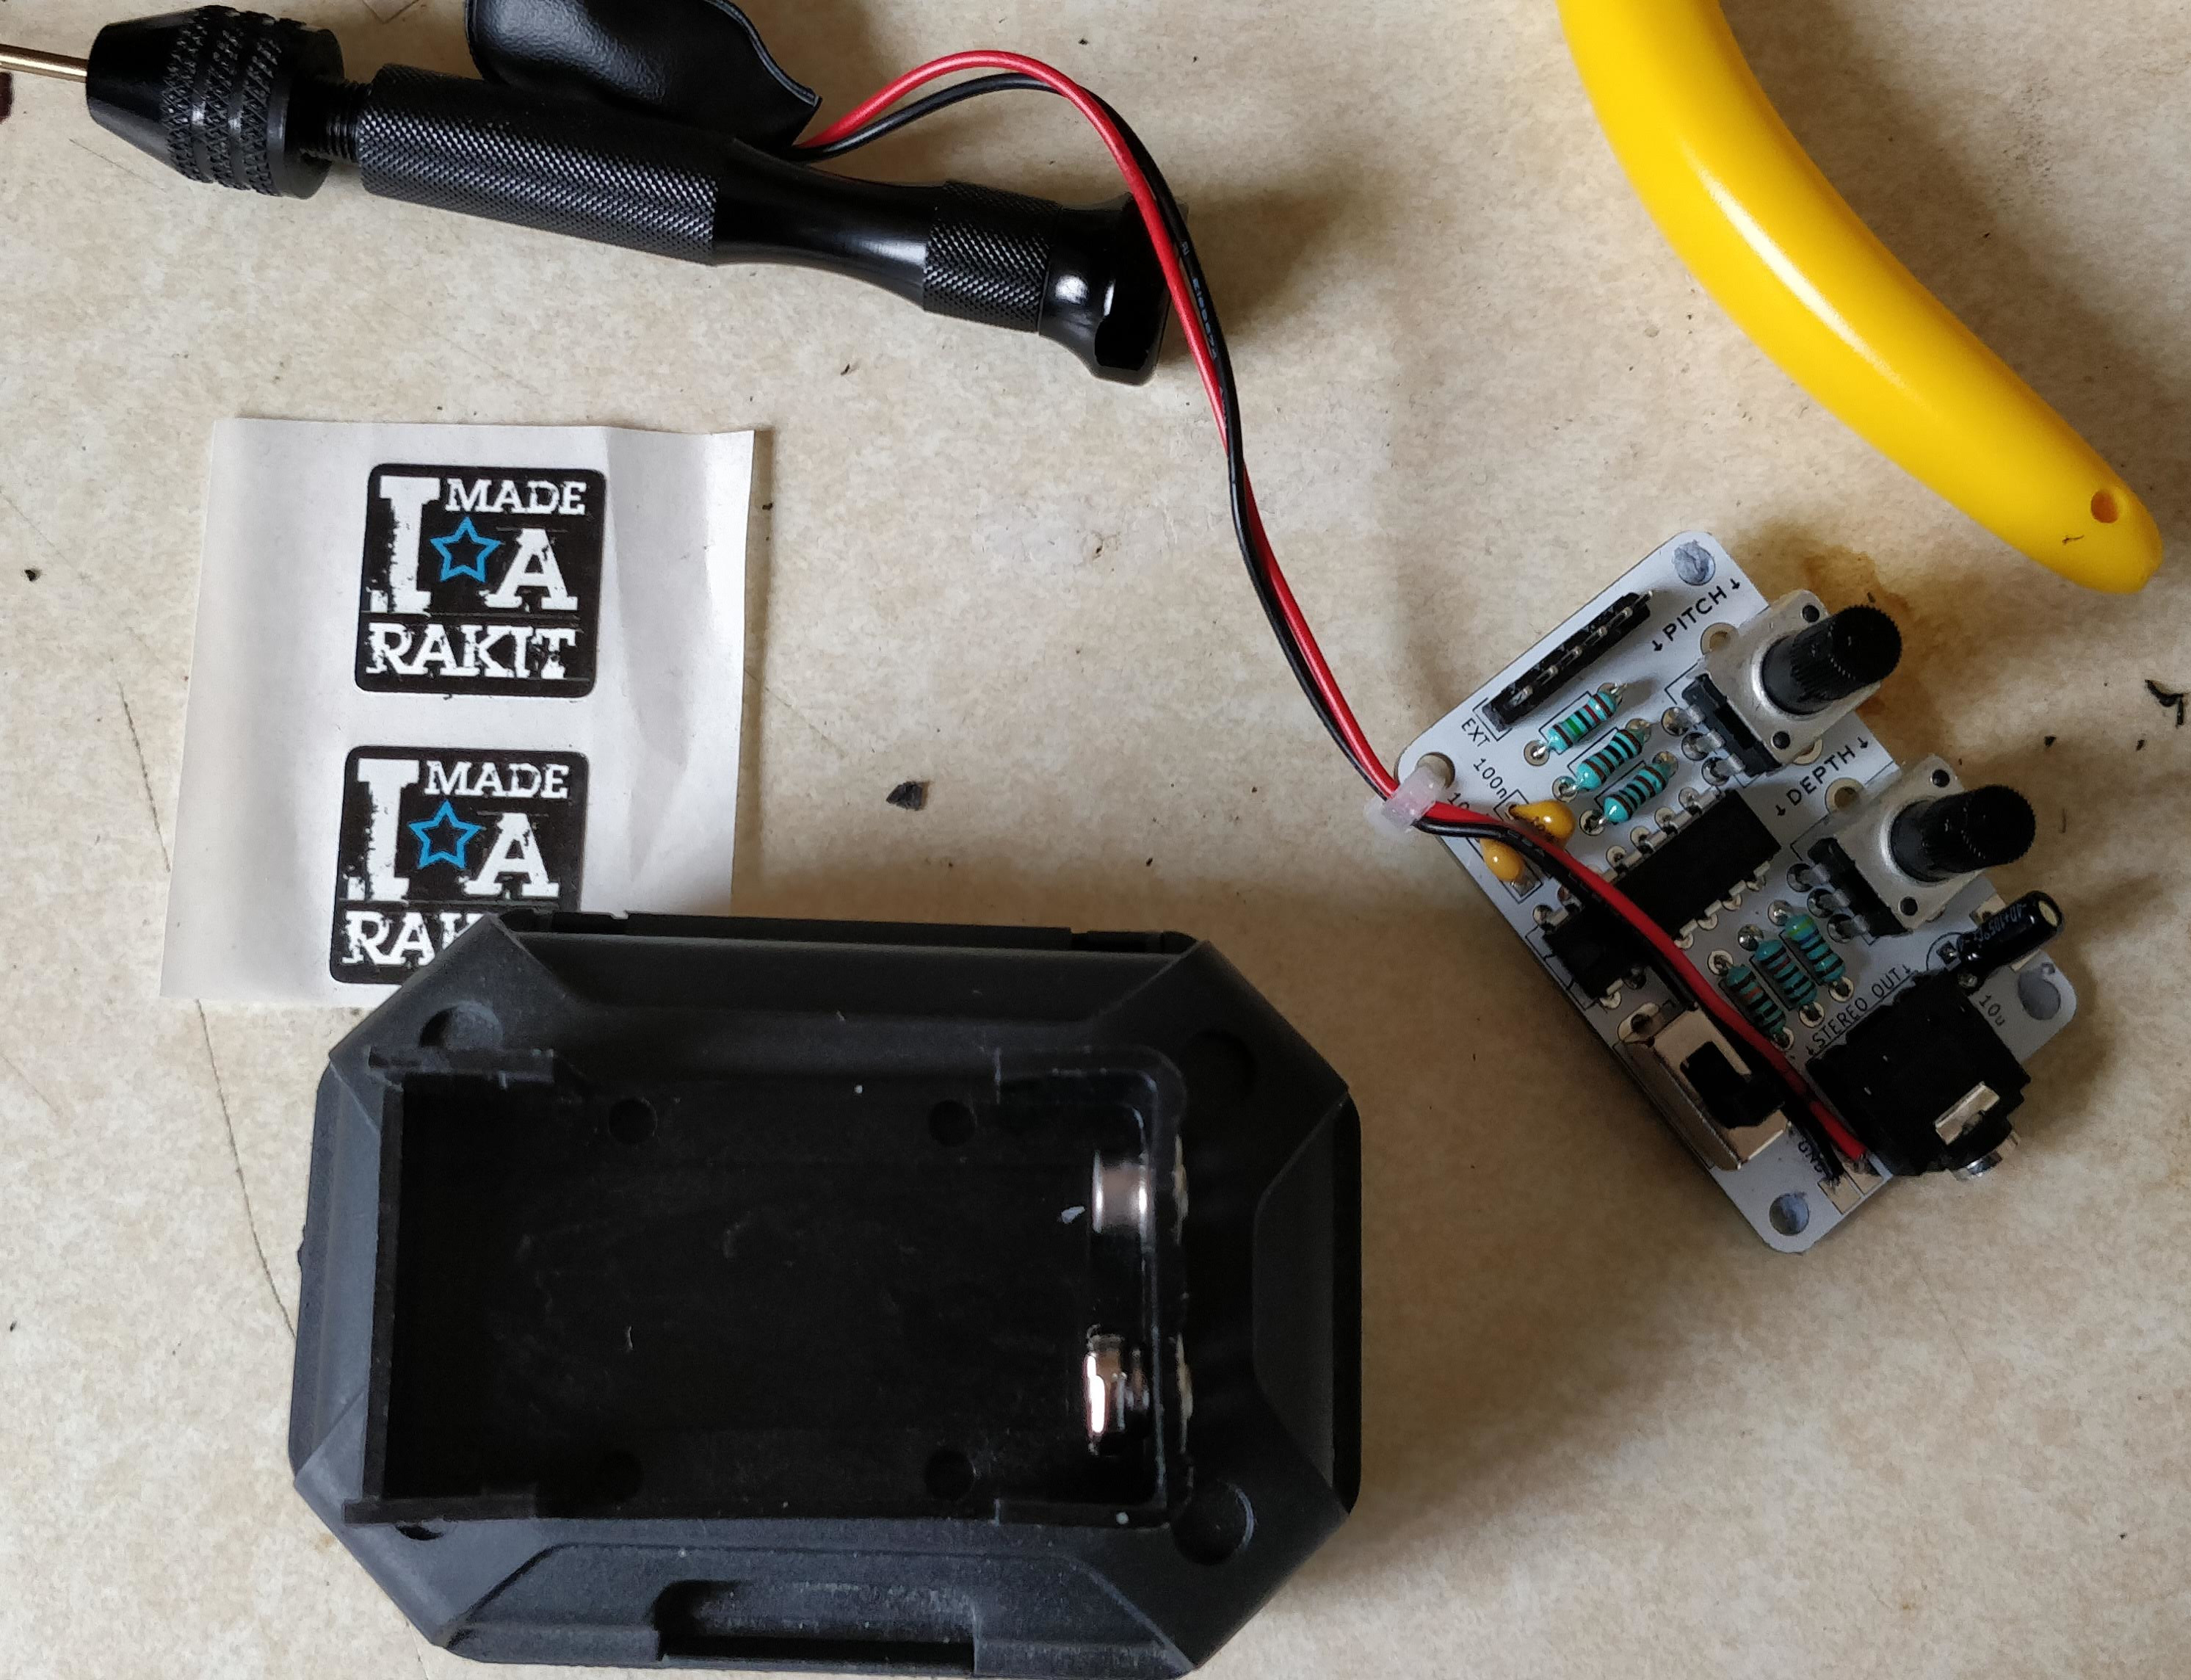
Gluing the battery holder

I created the grey padding in this photo using the cut up chunks of an old gas soldering iron taped together using insulation tape then with double-sided sticky tape placed on the bottom to keep it stuck in place. Sorry - were you expecting me to say I 3D-printed something? Sorry - I'm pretty low tech when it comes to building things like this. Be prepared for more when I post about other hacked electronics projects.
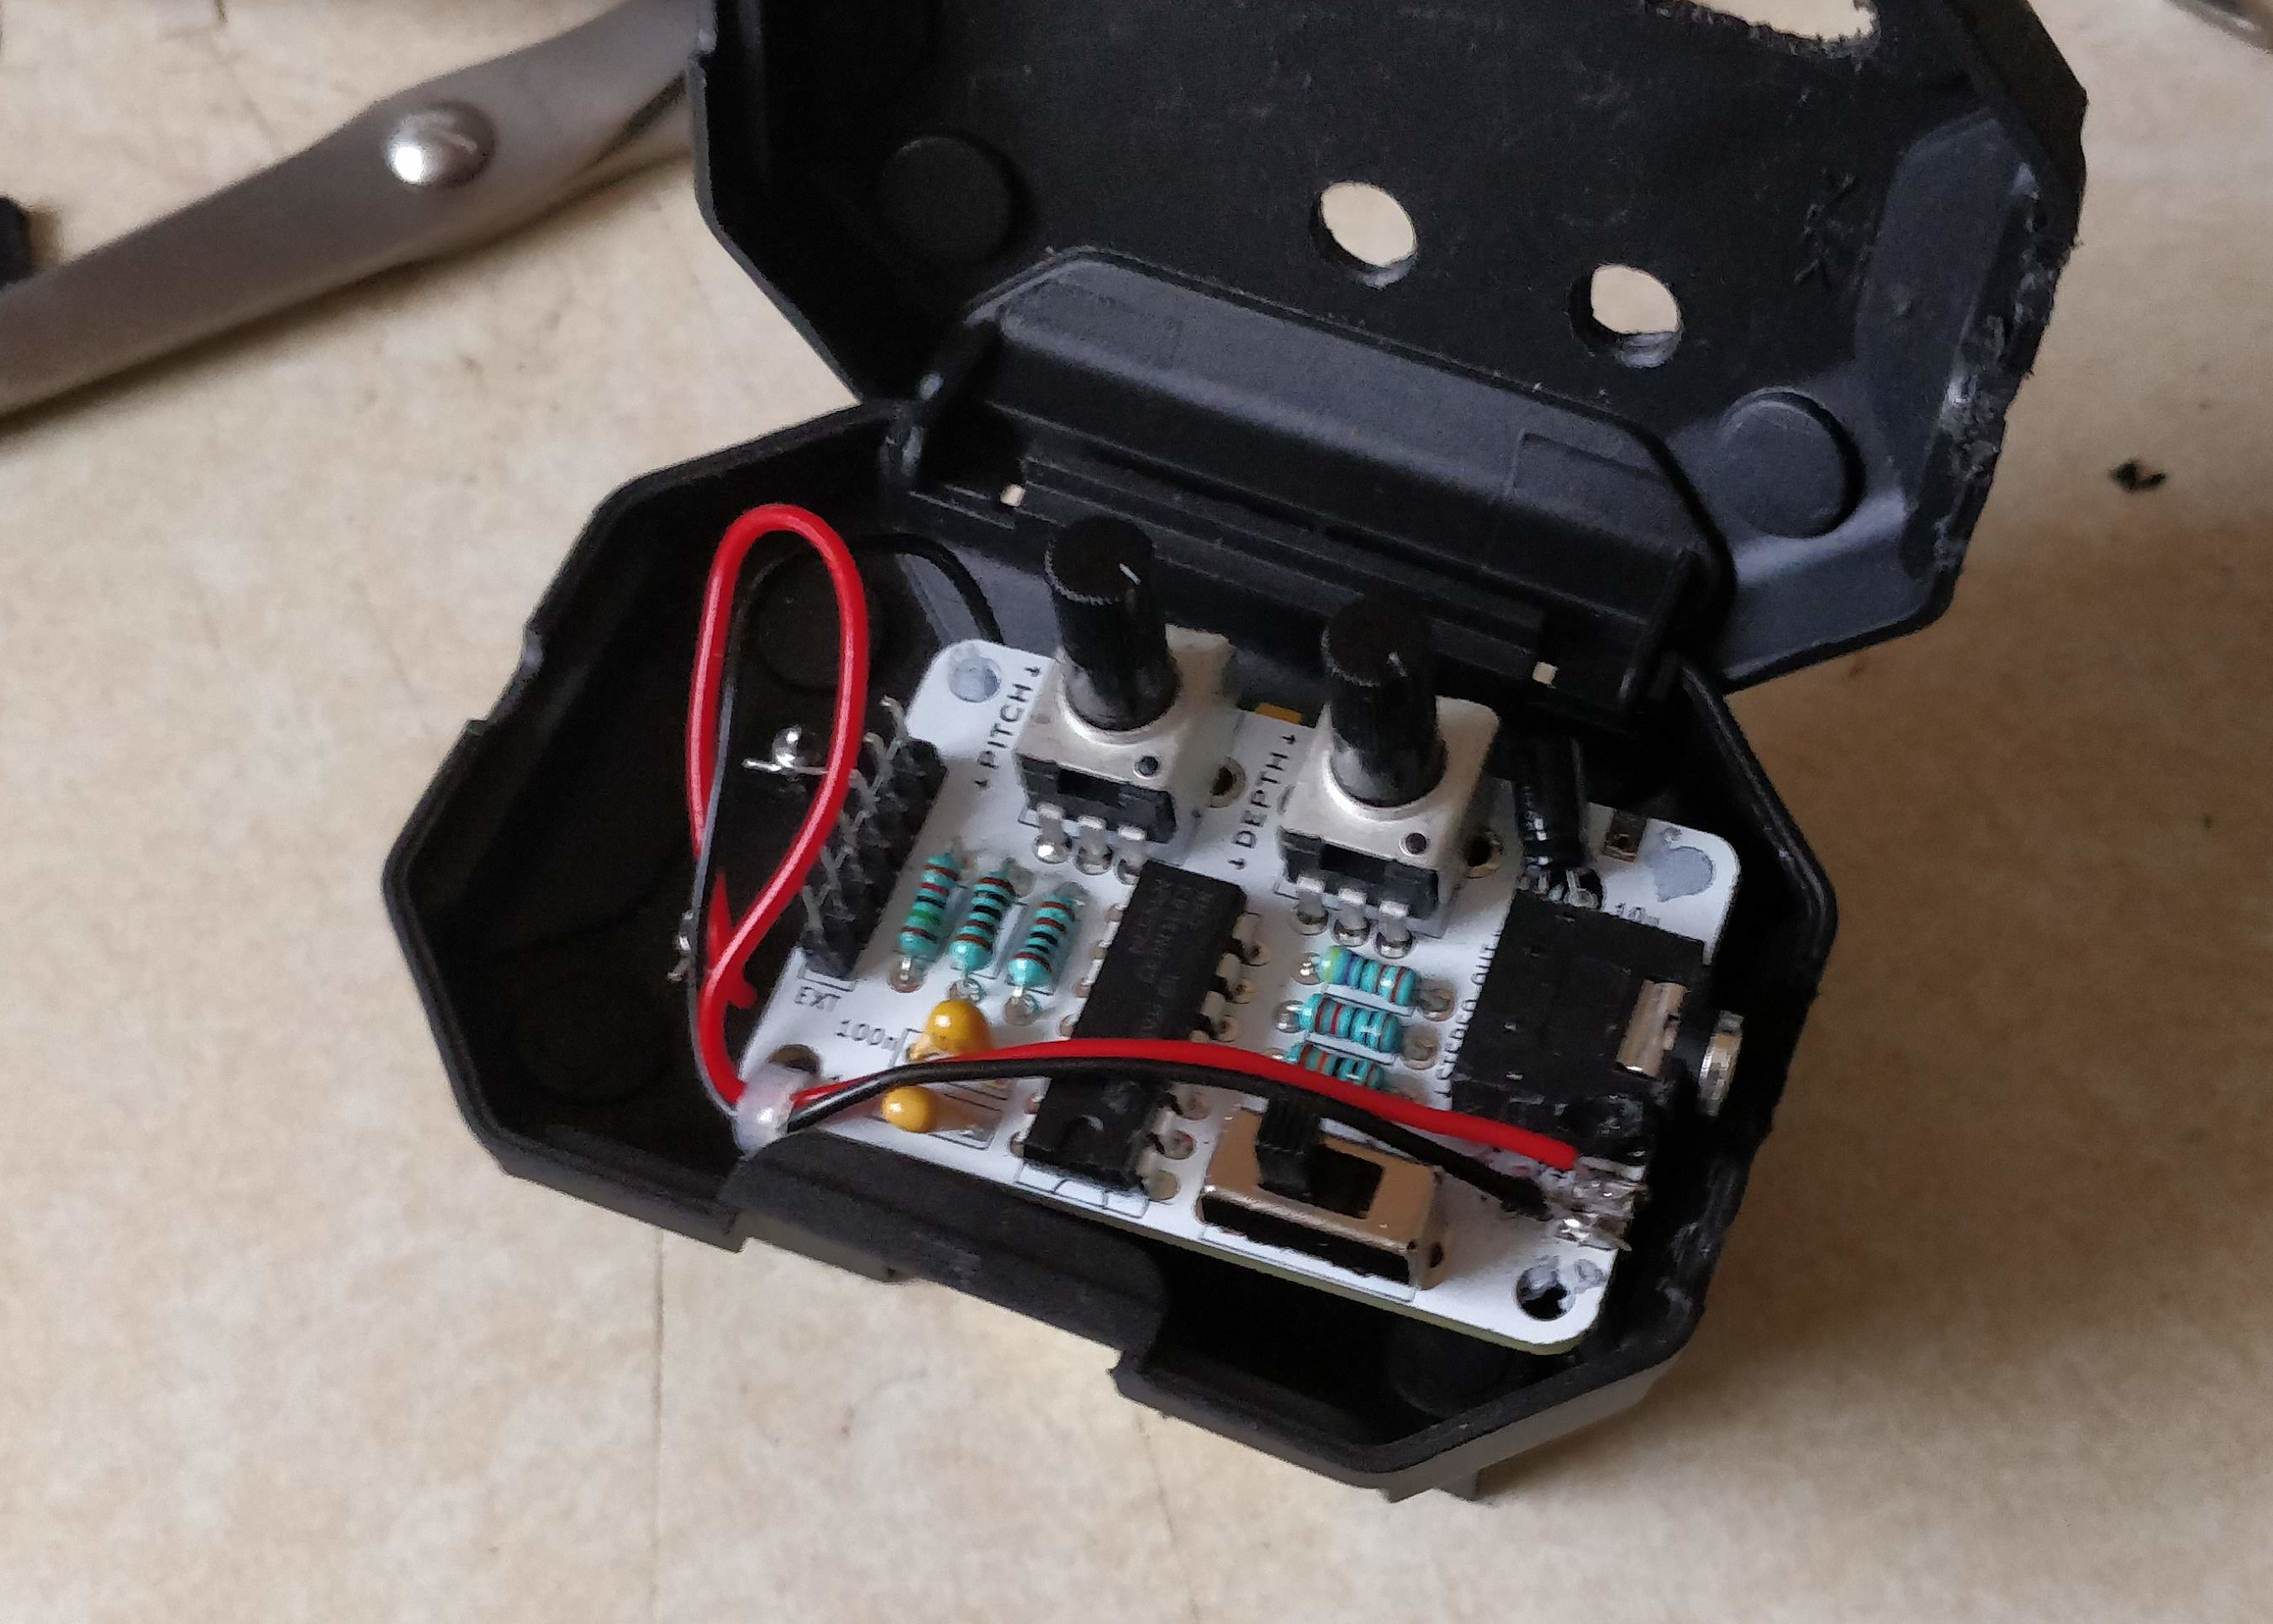
Insulated Padding Bottom Stuck With Double-Sided Tape

# How Did It Turn Out?

Not amazing but OK as a first attempt at putting a DIY electronics kit in a recycled project box. It gave me a MUCH greater respect for peope who build hardware boxes for electronics and taught me a great deal of what needs to be done to improve on my next adventure.

I thought a simple ruler, a few drill bits, and a craft blade would be enough. Little did I know the sheer complexeties and questions it throws up along the way - especially when not planned. Such as me having to put the POTs on the PCB into the holes before closing the box. Then finding it didn't align the output hole with the box hole. Also noticing that the POTS didn't align horizontally (see below).
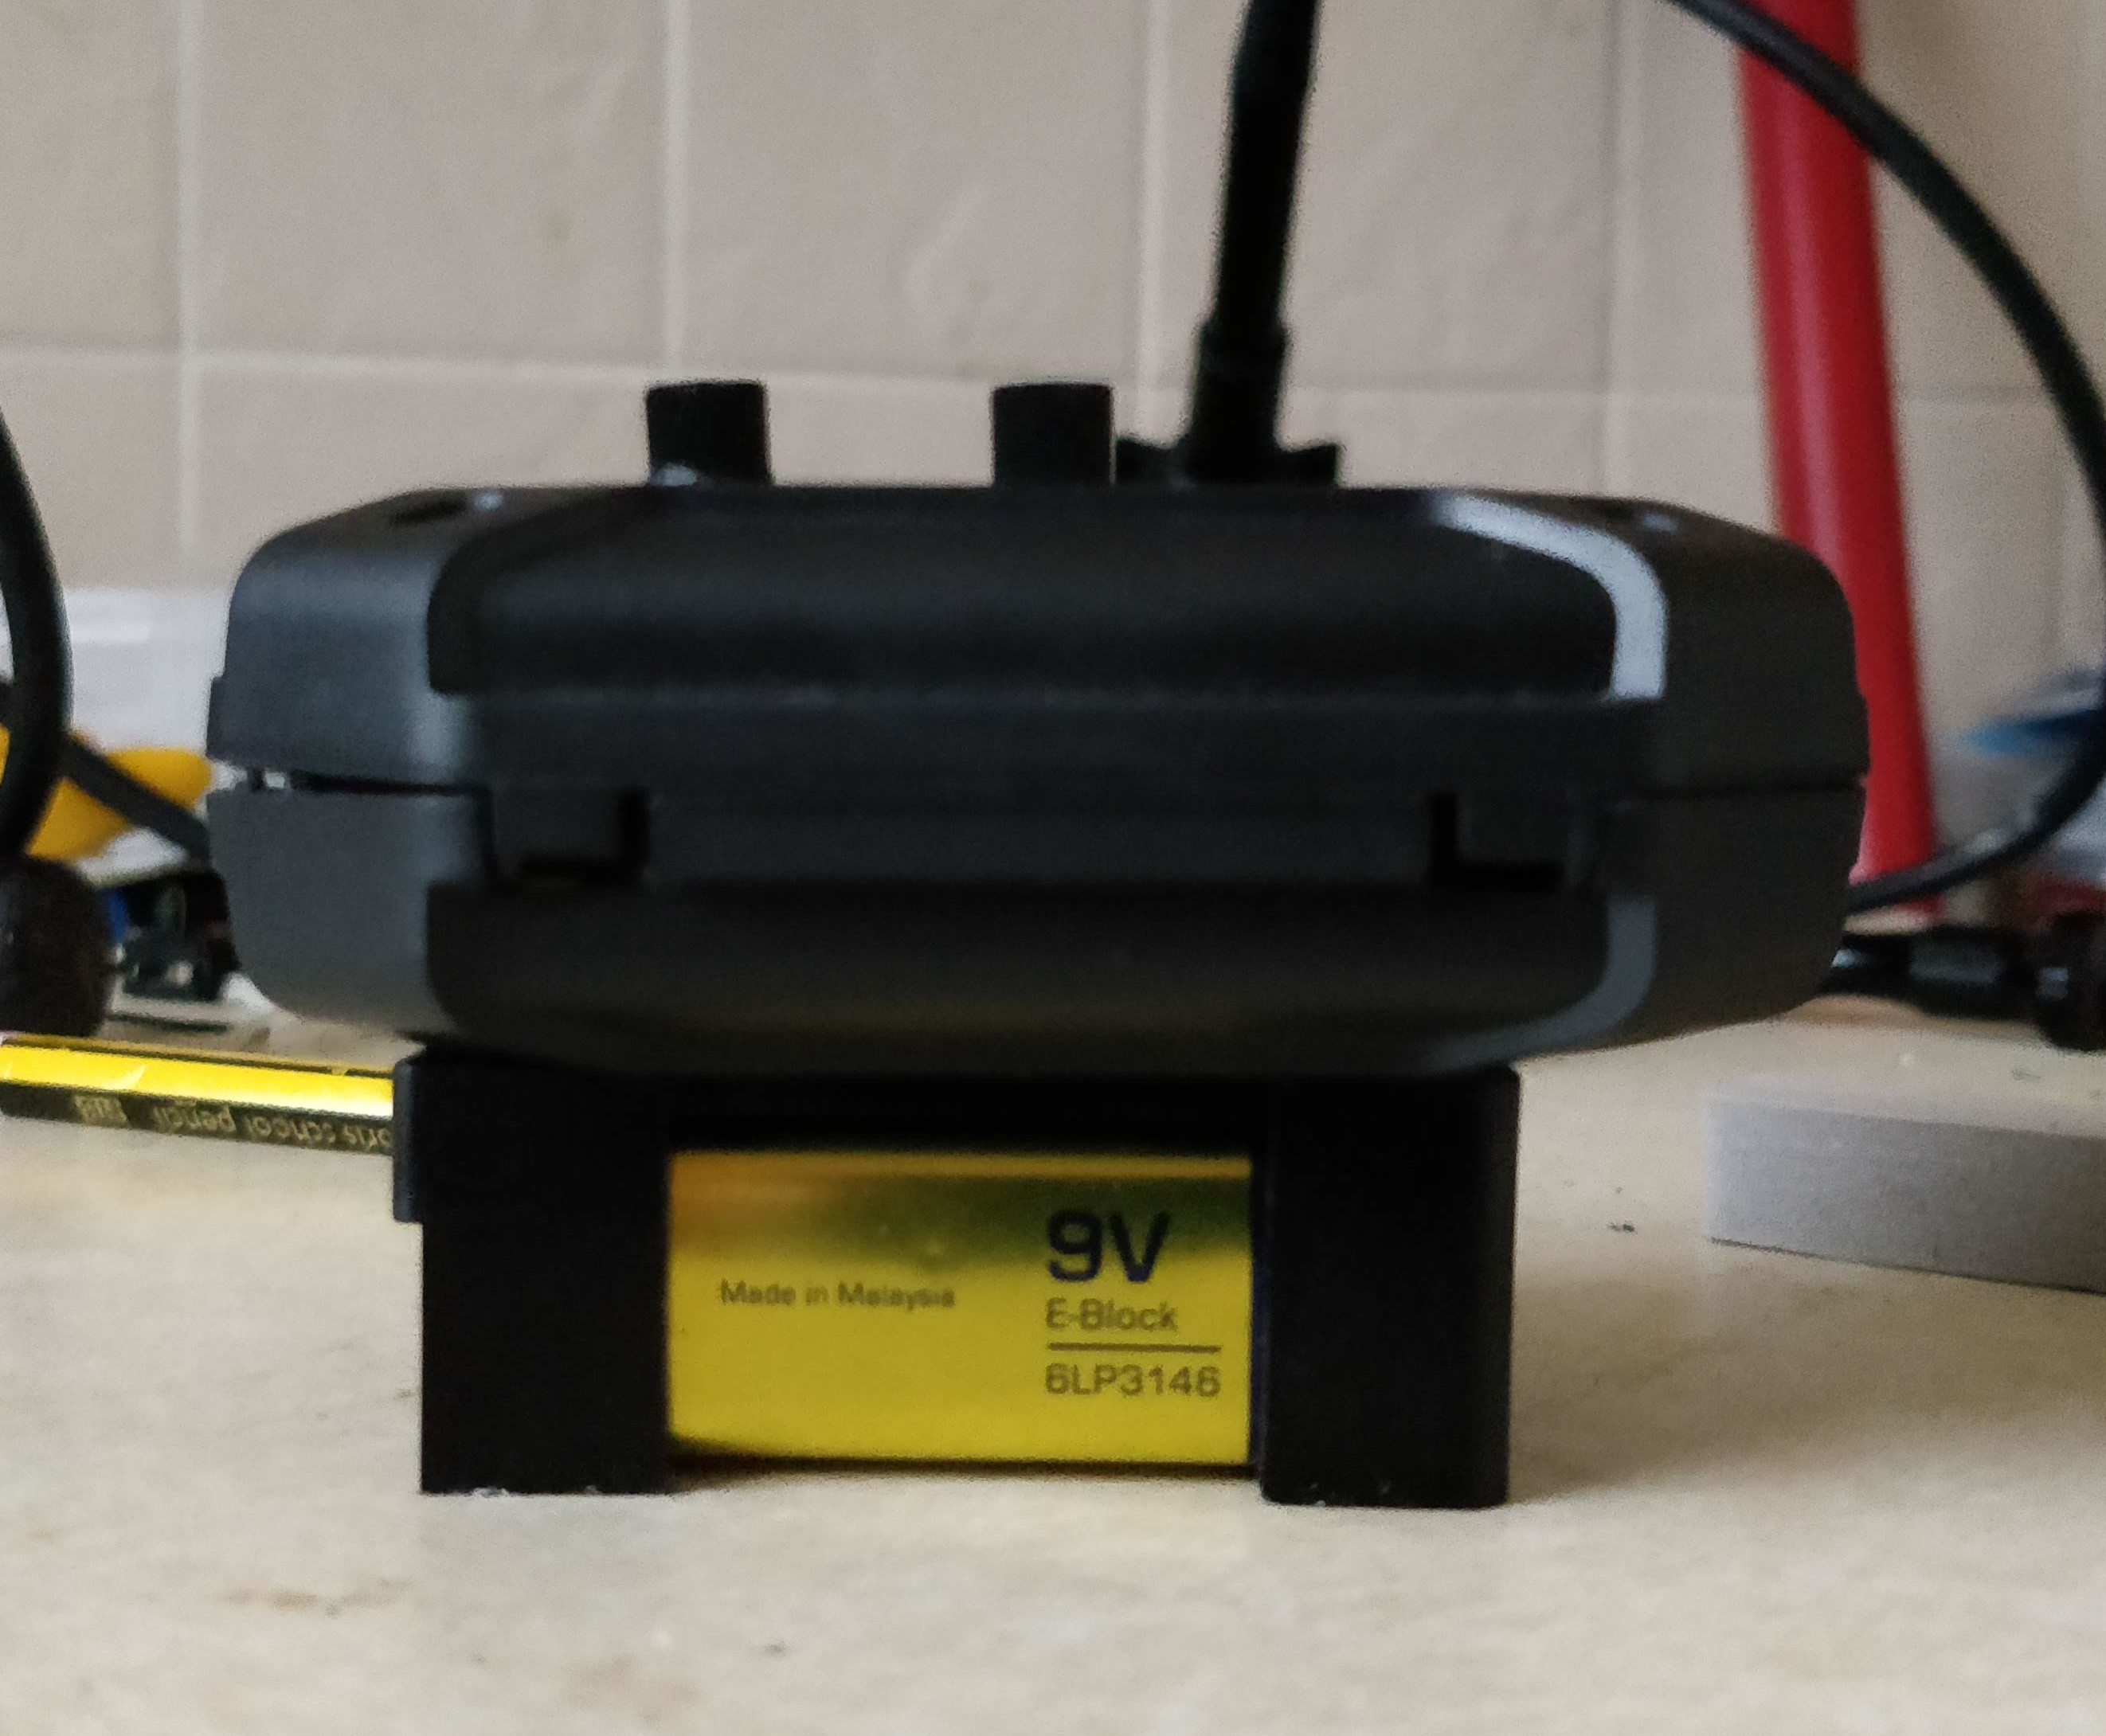
Notice how the finished projects POTS don't align?

Using superglue the wrong way and finding it melts wire insulation. A lot was learnt (see below). I've since bought another APC and will likely break out every single resistor not just the usual POTS as I noticed that changing the resistances in paralell gave different sounds. So I think there's more options there. A whole array of POTS in a long line with options to chain them into a Mega Deluxe Atari Console. I also got the Deluxe APC to do the same with. This time I've got better boxes and I'll use what I've learnt here on the new fully broken out versions.

# Its Important To Keep a Clean Work Area
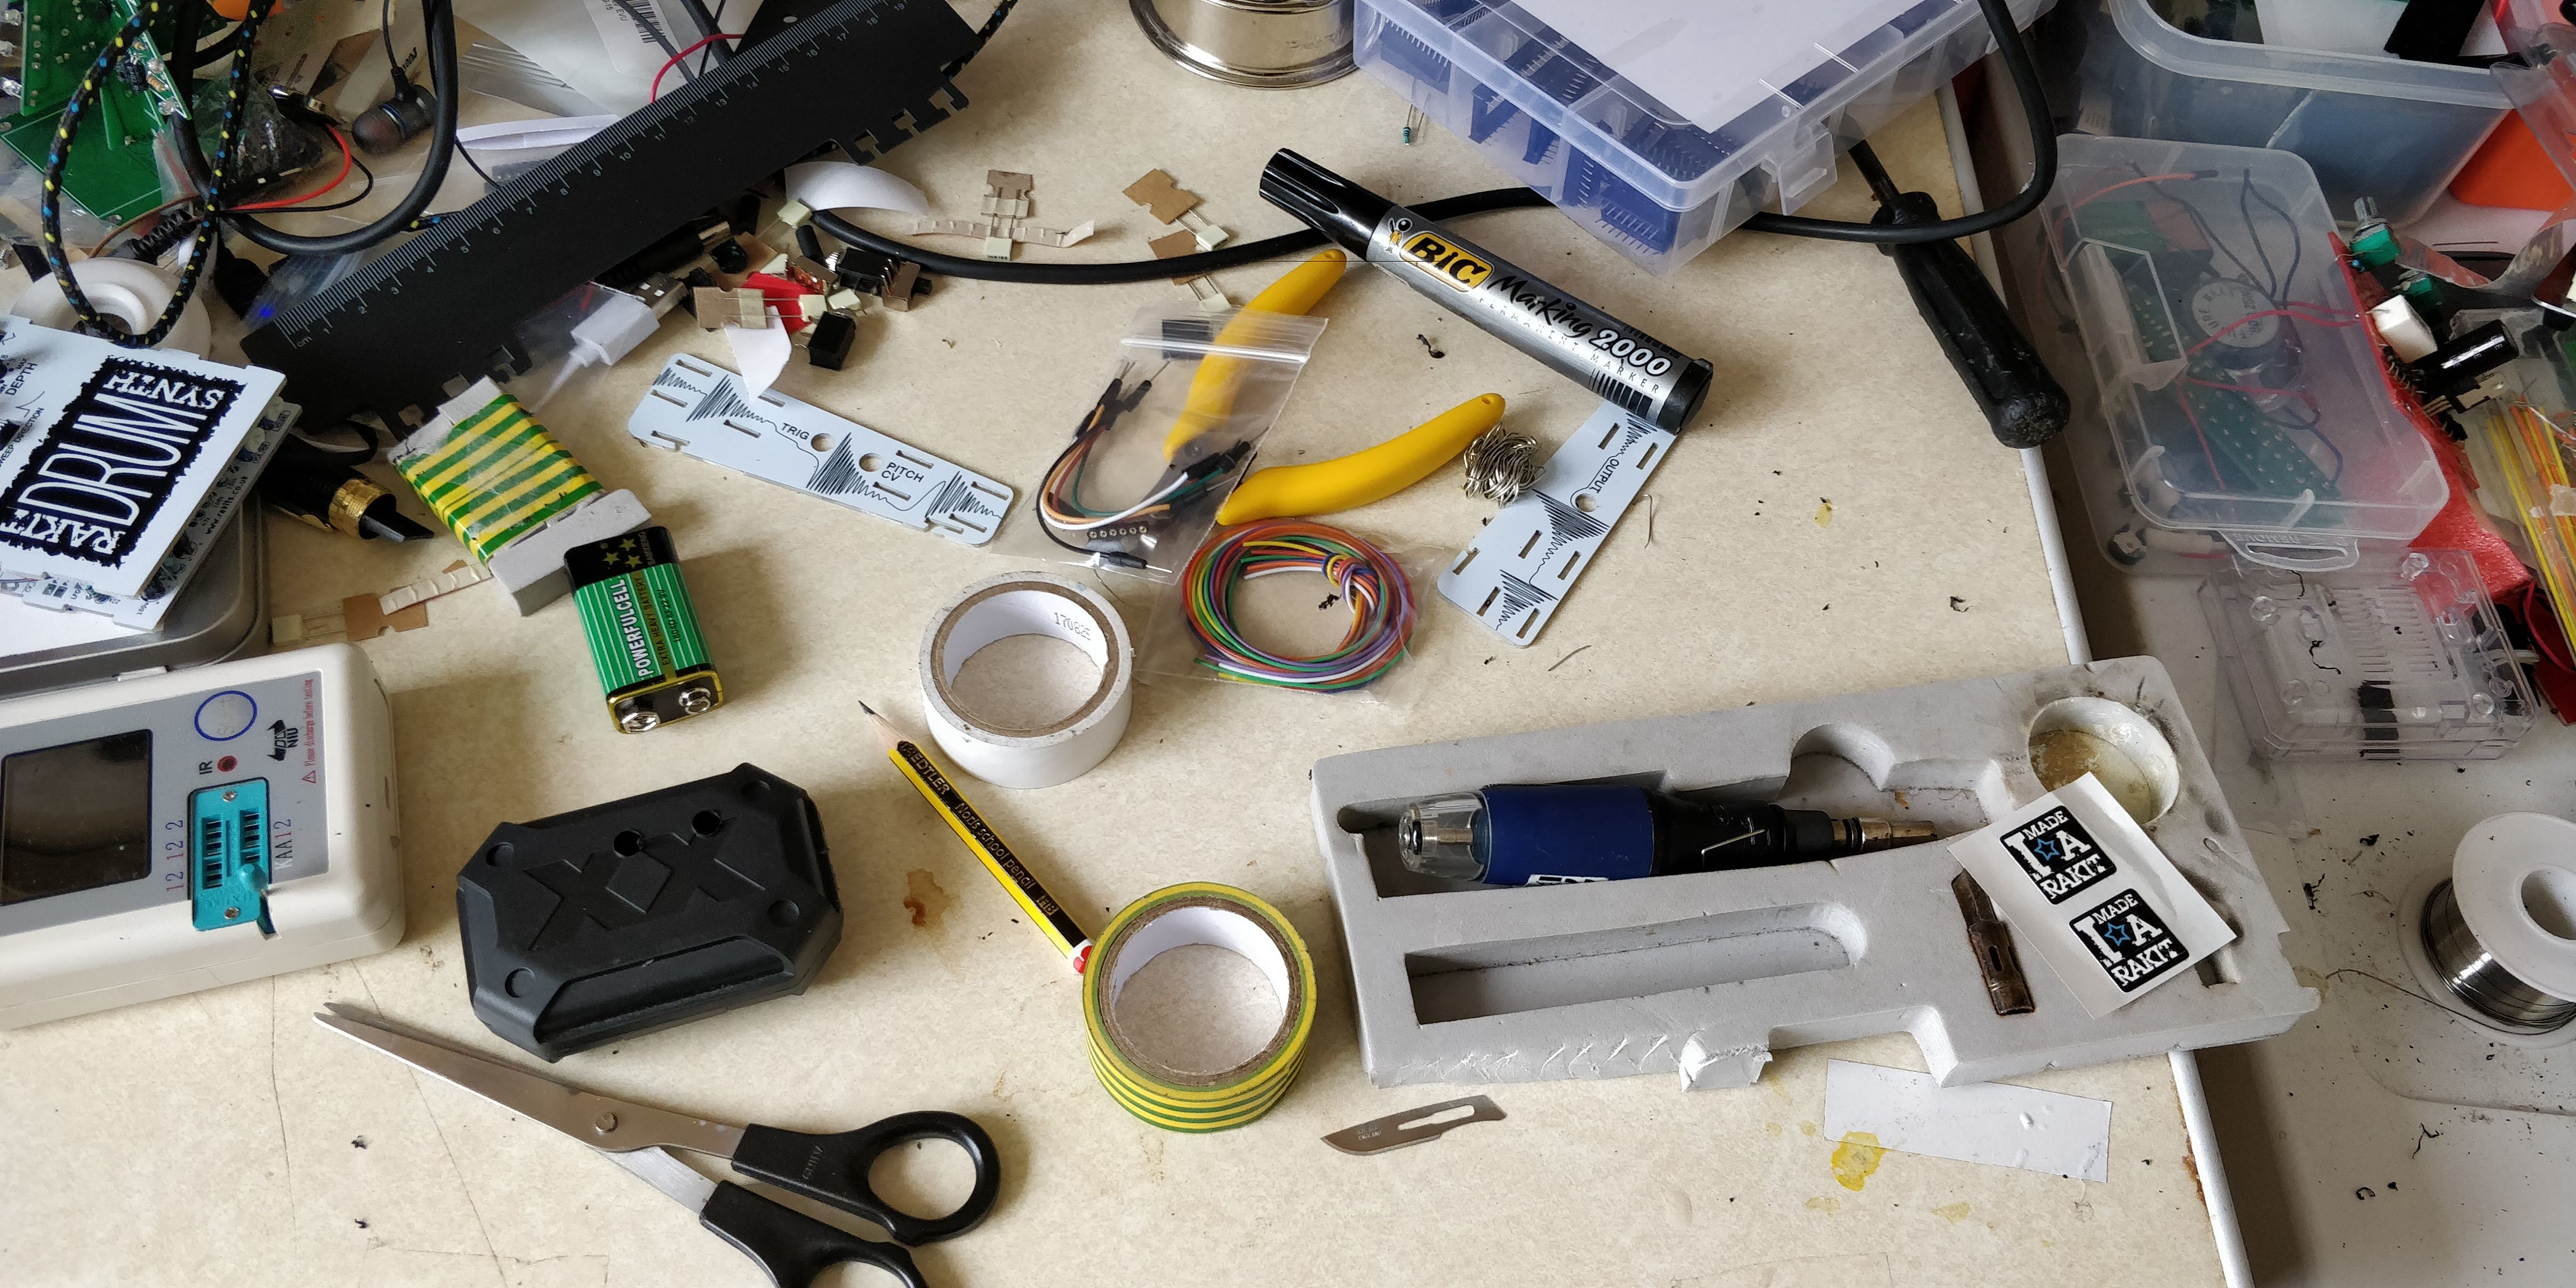
Always keep a clean work area

Notice I'm currently working on the drum kit. This project has given me a whole new insight into how complicated it must be to CAD and produce a case. To me the drum case seemed relatively simple until I had to produce my own project box!

But no seriously you should always keep a clean work area to make sure projects components don't get mixed up and solder standing or under a desk so you don't drop hot solder on yourself.

# What I Learnt

  • Plan and plan some more.
  • Measure once, nmeasure twice, cut/drill, measure thrice.
  • Be prepared to make mistakes.
  • Superglue makes wire insulation melt and potentially merge and short circuit wires.
  • Quick component testers are sometimes faster than a multimetre at giving you a resistor or capacitor value.
  • Making noise is awesome.
  • The continuity tester on my multimetre is great.
  • I'm not very good at making project boxes look good.
  • I have a renewed respect for the people at Rakits and for their designs and the work that goes into them. It ain't easy!
  • I like stickers!!
  • Don't solder over your crossed legs.
  • I'm a sucker for sweets!
  • It's possible to fiddle with the the boards components in paralell to make noises in different ways. Such as sticking POT terminals over a resistor and you get weird extra/other noises. As mentioned this will be the core of my next project with an APC.

If you're anything like me then programming probably isn't your only hobby and you try a fair few electronics projects at the same time. Two of my favourite Linux Magazines (Linux User & Developer and Linux Magazine) either have a regular Raspberry Pi sections OR they have tutorials about hacking Ardiuino's and related chips (ESP8266, ESP32 [Lua, MicroPython, C, etc]) in some way. There'S even a hugely popular UK magazine called MagPi which caters to people interested in hacking Raspberry Pi's or Pi Zero's.

This is my personally built up list of decent sites for electronic kits, components and hobbytronics:

# Chinese Suppliers

BangGood Logo

# Gadgets and Electronics

# BangGood.com

I'd make sure you're not buying a trademarked/patented device suchh as the Teensey's which have official distributors but their ESP8266's are 10% the price of buying UK versions for the same equipment. For example at time of blogging here's BangGood's NodeMCU ESP8266 selling for £3.38. At Pimoroni they're selling for a whacking £12 before delivery. Did I mention Pimoroni charge delivery on top whereas BangGood are all free delivery? The only disadvantage being you have to wait a week instead of a few days. Check BangGood before anywhere else if you want DIY electronics kits, Arduinos, ESPX chips, etc. You really can make a MASSIVE saving. In fact BagGood are so much cheaper that for still less than what POimoroni charge you can get an ESP8266 chip with a tiny OLED screen embedded on the board for £7.66!!!

As a sweetener here's a few coupons they have going at the mo:

# GearBest

Tending less to the smaller components and more to gadgets its still worth checking this company out as they are one of the Chinese providers that offer massive discounts on expensive western imports.

# Raspbbery Pi/Arduino:

The Pi Hut Logo

# The Pi Hut

I have it from the horses mouth that if you want the latest and greatest of DFRobot's cool newest gadgets in the UK then these guys will have it first. I'm a HUGE fan and can easily spend hours just browsing their Maker section. I also have the afformentioned Beetle and μHex Controller from them.

ModMyPi Logo

# ModMyPi

Specialises mainly in Pi's and doesn't deviate much into the general hacker space like the Pi Hut which has its own maker area. ModMyPi can also be a bit expensive. Havoing said that they are oftenb the first to release things like Google's AIY or Raspberry Pi robots.

# Pimoroni

Has a really good selection of both official Pi and Arduino equipment as well as being one of the best Ada Fruit supplier in the UK. So if you're looking for an AdaBox (personally I think they're a rip off) then you can't go far wrong with Pimoroni. But be prepared - they charge heavily for what you get.

In fact I've compared prices before between the 3 major sites so far mentioned and found prices variances of £5-20 for a small product. But I've noticed in recent months a convergence of prices which concerns me as they are the major suppliers for makers at the moment. Am I being paranoid thinkning they're price fixing or just watching each other and price matching? Nowadays I find myself split between who charges the most for delivery as all the prices are exactly the same. Or I use one of the Chinese sellers or general electronics suppliers

# Maker/Hacker/Hobbyist Electronics

These are great for finding custom kits or something a bit different. These always fill a niche and I always have a browse now and again to find something new and cool to work on.

# BitsBox

They do lots of the most commonly used components but also have a great little selection of DIY kits for things like amplifiers, FM Bugs and much more. What I also like is their great collection of easy to navigate enclosures or project boxes. Some coming with battery doors making them really handy.

Rakits Logo

# Rakits

I love these guys so much! One of my favourites for DIY sytnth kits! They were one of my first forays into noise making projects and I discovered them via their ebay shop. I already have one oif every one of their kits but plan on buying extra of all of them to create breakout versions to put in project boxes I've bought from BitsBox to create my own little synth playground with sequencers - the works.

# Hobbytronics

Not a company I've used much for except the odd kit not available elsewhere. Always worth a check out though to make sure you're getting the best deal when checking other sites.

# Conrad Electronics

Only recently discovered these guys and I'm already super impressed by their sheer selection of DIY project kits for electronics enthusisasts that covers Arduino's, Pi's and every other type of maker and hacker type out there. Check out their kit section to get an idea of what I mean.

# Electronic Components

I recommend these only if you know exactly what you want and have a code for an IC or transistor. As they have so many products its difficult to navigate the search to find individual products.

Farnell Element 14 Logo

# Farnel/Element14

These are one of the main official distributors of Raspberry Pi's as designated by teh RPi foundation. So you don't just get resistors, capacitors and whatnot here. You can get practically anything & everything yoiu want from these guys but the prices are a biut hefty unless you're buying in bulk. Its also a pain sifting through the sheer quantity of components for exactly what you need. Come prepared with exact component numbers and types.

CPC Electronics Logo

# CPC

Actually part of the Farnell group so you'd expect the prices to be the same. Except they're not. I think one is mainly for business while the other consumer but you can buy from either and its worth cross-checking both for pricing. Bare in mind they also charge differently for delivery.

# Missed Off?

If you think there's any companies I've missed off the list be sure to email me dougbromley @ gmail etc.

In this post I just wanted to show a simple example of how easy it is to include a small part of VueJS 2.0 into a small part of the page. Thats one of the great things about VueJS 2.0. It doesn't have to take over the entire page. It can simply take control of a small section, a button even. Whatever you want.

So here goes. I'm going to create a VueJS 2.0 Hello World app then follow it up with Gist and a JSFiddle link to the code.

I, {{ author }}, made this

Check out the JSFiddle for this here.

VueJS 2.0 Logo

In a previous post I mentioned how I'd setup a repo called "arduino-experiments" to learn Arduino better and eventually to move onto ESP32 and ESP8266 chips. The repo was set up with a directory structure with a general set of rules and I'd have all my experiments in different directories. With each experiment getting more and more difficult. As this has gone on I've learnt far better, easier and faster with practical examples and its given me much more focus and motivation in my learning. Even producing actual production items such as my LCD displaying temp/hum sensor unit.

So I decided why not do the same for VueJS

I've tried learning VueJS a few times and failed miserably due to having little structure and using multiple courses with no solid line guiding me., But as I'd found success in thre Arduino way I decided to buckle up and use the same method.

Gitlab Logo

# So say hello to VueJS2.0 Experiments

This repo is hosted on Gitlab (my preffered choice for work and 'proper' projects due to its free nature and CI/CD features).

You can check out the repo and whats going on at any time at the link above.

My first port of call with this has been to use a Udemy course by Maximilian Schwarzmüller which has a 4.7 rating and if not at time of blog I've picked up for $10. Its a fantastically detailed look into Vue and I've started it form the beginning and I'm just getting into doing the basic getting it working in JSFiddle and moving onto doing full Single Page apps late rin the course.

# Introduction

I've recently begun creating a repo under my account with a range of related sensor-based experiments. These all have a final goal in mind.

However as I planned to build a multitude of static LCD displaying sensors around the home I came across chips called the ESP8266 and ESP32. They seemed to be cut-down Arduino's with WiFi. The absolute panacea people had been waiting for to develop the perfect IoT devices.

But before I could run with these devices dealing with Wi-Fi conectivity and this acronym I kept hearing (MQTT) which seemed to make ESPXX solution sound more complicted I ewanted to conquer Arduino sensing and displaying first.

So that's what I did and that's what the repo is for. To first master the arduino then moive onto the ESP.

At first each room will have an Arduino showing one or more of the following:

  • Temperature (C)
  • Relative Humidity
  • Light (LDR)
  • Microphone (either actual sound or just the sound level in decibels which can be worked out using formulae).
  • Barometric pressure (maybe redundant in multiple rooms of a home).
  • Carbon Monoxide levels
  • Cardon Dioxide levels
  • Other gases (check out the sheer number of MQ sensors!)
  • Dust levels (courtesy of a rather expensive Sharp Electronics dust sensor).

All of the above will then be put up on a dashboard. So far I'm unsure whether to keep it local and build my own Flask API or use one of the many IoT services out there.

# Hang on I thought you said "Arduino", what's this ESP-whatsit?

Great question no one asked but I'm pretending you did! The ESP8266 & upgraded ESP32 are a group of chips developed by a company called Espressif Systems as a low cost Wi-Fi chip with full TCP/IP capability. I describe them to people as "chopped down Wi-Fi Arduinos the size of a chunky nano version".

So it has digital inputs, runs at 3.3v (which can be a bugger as most sensors can be 5v). It has WiFi obviously and a number of inputs and outputs including CLK digital 1 analog GPIO pins and others depending on the specific brand. Some of the more popular ones are:

All of them offering something a bit different but still a spin on the basic chip design of the ESP8266/ESP32.

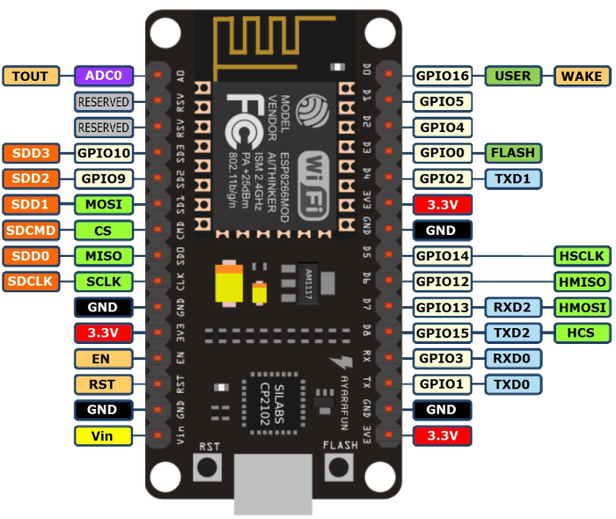
# ESP8266 Example Pinout

ESP8266 Pinout

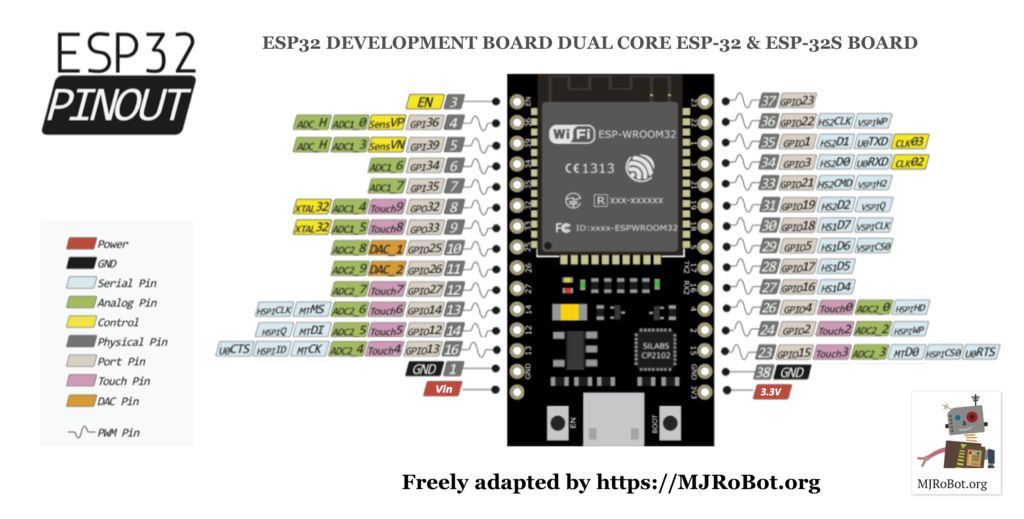
# ESP32 Example Pinout

ESP32 Pinout

# The Future

So what happens when I feel happy I've conquered the various sensors, displays and experiments with the Arduino? Build them in ESP32 and ESP8266 versions of course and use one of the serviucres mentioned in another post or my own local Flask dashboard and API. Here's to an exciting IoT future.